Are you looking for a way to see ‘not provided’ keywords in Google Analytics?
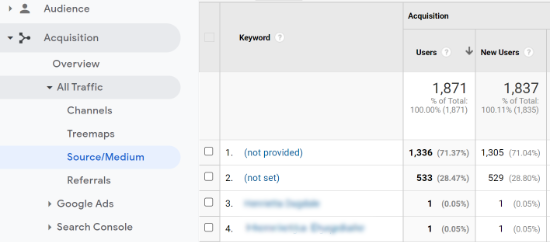
Google Analytics is a powerful tool that shows how people discover and interact with your website. However, when you try to view which keywords they use to find your site, you often see ‘not provided’ in Google Analytics.
In this article, we’ll show you how to unlock your ‘not provided’ keywords in Google Analytics.

What is Keyword ‘Not Provided’ in Google Analytics?
Google Analytics collects information about your website visitors and display them in easy to understand reports. However, Google introduced a more secure search experience for users in 2011.
To protect users’ privacy, Google adopted Secure Socket Layers (SSL) to encrypt searches of visitors that are logged in to their Google account.
Because of this, if you try to find out which keywords your visitors use to find your website, then you’ll see ‘not provided’ in the Google Analytics report.
As a marketer and business owner, finding out the search terms people use to visit your site is extremely valuable. You can use this data to optimize your WordPress SEO and skyrocket your traffic by targeting the keywords that actually drive traffic to your site.
You can also use those keywords to generate new content ideas and answer questions that people may have about your brand.
That being said, let’s find out how you can unlock not provided keywords in Google Analytics.
Unlock Not Provided Keywords with Google Search Console
The easiest and most reliable way to see which keywords your visitors use in search engines is by using Google Search Console (previously called Google Webmaster Tools).
It is a free tool that helps you measure your site’s traffic from search engines, index web pages, find and fix issues, and improve your overall SEO.
You can start by simply visiting the Google Search Console website. After that, you’ll need to connect your WordPress website.
The free All in One SEO plugin makes it easy for you to do that.
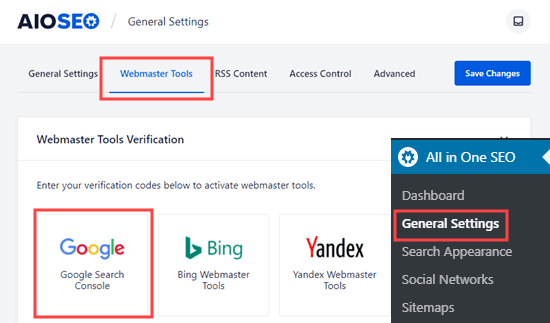
If you need help, then please refer to our detailed tutorial on how to add your WordPress site to Google Search Console.
Once you’ve added your website, the next thing to do is connect Google Search Console with Google Analytics.
First, log in to your Google Analytics account and then click the ‘Admin’ option (gear icon) at the bottom left corner of the menu.
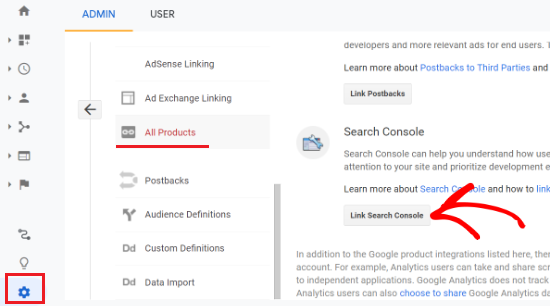
After that, you’ll need to click the ‘All Products’ option under the Property column. Now navigate to the Search Console section and then click the ‘Link Search Console’ button.
Next, you can click the ‘Add’ button to add Google Search Console.
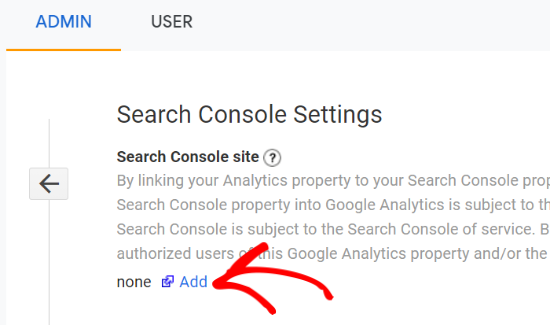
On the next screen, you’ll need to select a Search Console property from the dropdown menu that you’d like to link to Google Analytics.

Next, you’ll need to select the Google Analytics property that you’d like to connect with Google Search Console and click the ‘Continue’ button.
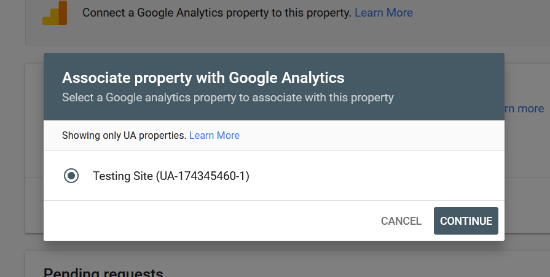
A popup will now appear which will confirm the connection between the Google Analytics and Google Search Console. You can go through the properties once more and make changes if you want.
Next, go ahead and click the ‘Associate’ button.
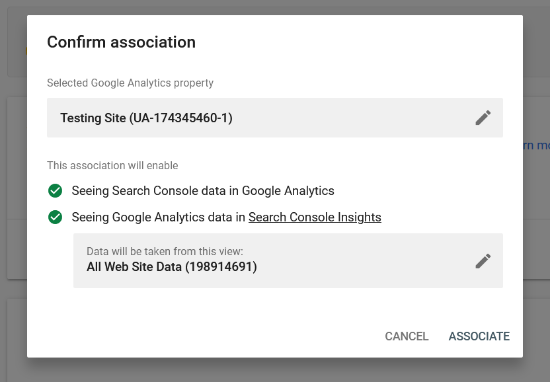
Once that’s done, you can head back to the Google Analytics Search Console settings page. Now refresh your page and your Google Search Console will be connected to Google Analytics.
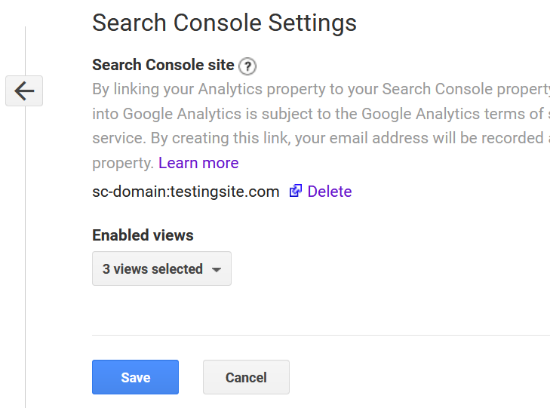
Go ahead and click the ‘Save’ button to store your settings.
Next, you can view your not provided keywords in Google Analytics by navigating to Acquisition » Search Console » Queries.

The report will show the number of clicks your website got in Google search results. Besides that, it will also show you the number of impressions for each of your keywords.
Impressions are the number of times any URL from your website appeared in the Google search results and was viewed by a user.
Other metrics you’ll see will include the click-through rate (CTR) and average position of your keywords. The average position metric shows where your search query is ranking on Google.
How to View ‘Not Provided’ Keywords in WordPress
Do you want to uncover your not provided keywords and see the Search Console report inside your WordPress dashboard?
Using MonsterInsights, you can view your Search Console report in the WordPress admin area and discover the top Google search terms without having to leave your website.
MonsterInsights is the best Google Analytics plugin for WordPress on the market. The plugin makes it super easy to set up and use Google Analytics. You can get insights to grow your business, track your site’s performance, and make data-driven decisions.
It also helps in setting up advanced tracking such as eCommerce conversions rate, link click and button click tracking, custom dimensions, and more without the need to edit code.
Note: We’ll be using the MonsterInsights Pro license for this tutorial as it includes the Search Console report and advanced tracking features. There is also a free version, but you won’t be able to view your top search terms.
First, you’ll need to install and activate the MonsterInsights Pro plugin on your website. For more details, you can check out our guide on how to install a WordPress plugin.
Once the plugin is active, you’ll need to connect it with your Google Analytics account. If you need help, then simply follow our guide on how to install Google Analytics in WordPress.
Next, you can navigate to Insights » Reports from your WordPress admin panel and then select the ‘Search Console’ tab.
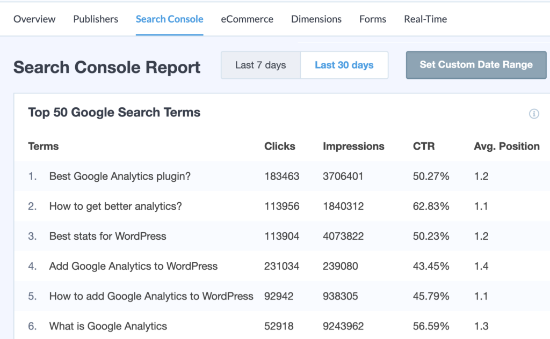
In the report, you can view the top 50 Google search terms that people use to find your website. Besides that, you’ll notice more metrics including clicks, impressions, click-through rate, and average position of each keyword.
Use Semrush to Unlock Keywords Not Provided
Another way you can find out which keywords people enter in search engines to find your site is by using Semrush.
It is a popular SEO tool that’s used by professionals, SEO experts, bloggers, marketers, and businesses of all sizes.
Semrush lets you do keyword research, see which keywords your competitors rank for, uncover backlink opportunities, perform site audits, and much more.
By connecting Google Search Console and Google Analytics with Semrush, you can easily unlock not provided keywords.
First, you’ll need to sign up for a Semrush account.
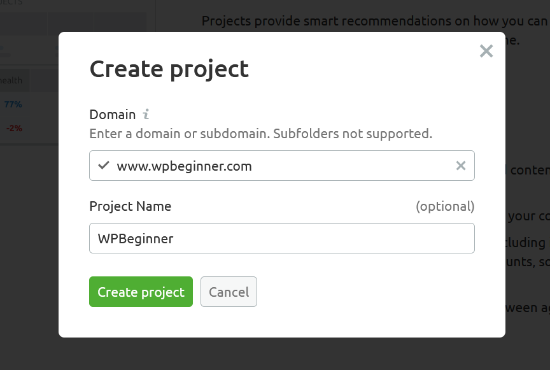
When you’re logged in, simply head over to the ‘Projects’ section from the menu on your left. You’ll now need to create a project by clicking the ‘+ Create Project’ button.

Next, a popup will appear where you’ll need to enter the URL of your website and add a project name. When you’ve done that, simply click the ‘Create Project’ button.
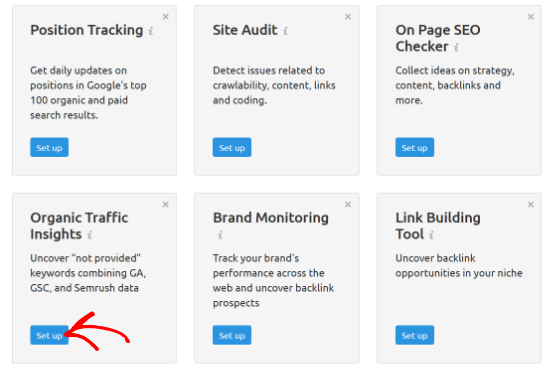
After that, Semrush will show you different tools you can set up in your project. Go ahead and select the Organic Traffic Insights option by clicking the ‘Set up’ button.
On the next screen, you can click the ‘Connect Google account’ button to integrate Google Analytics and Google Search Console.
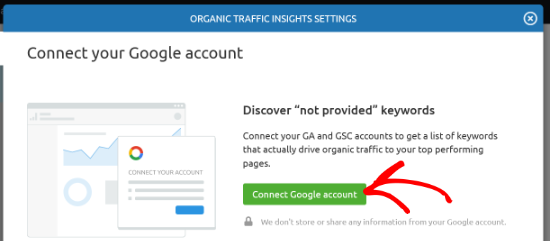
Next, go ahead and choose your Google account to connect with Semrush.
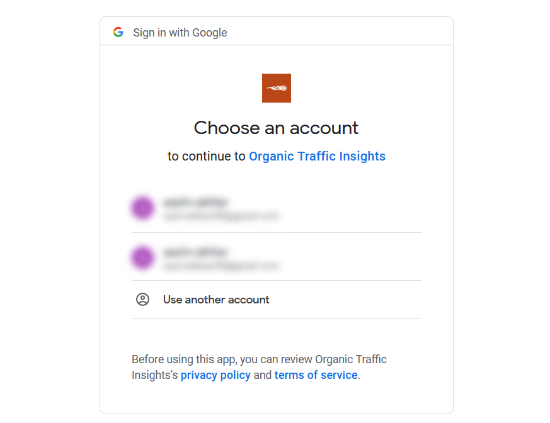
After that, click the ‘Allow’ button so Semrush Organic Traffic Insights can access your Google account.
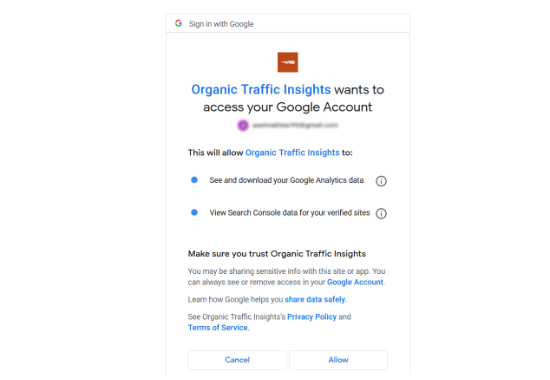
Now select your Google Analytics account, property, and view. Then choose your Google Search Console property and click the ‘Select database’ option.

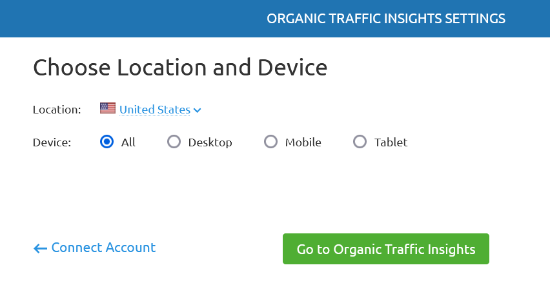
Next, you can choose your location and which devices you’d like Semrush to record organic traffic insights from. You can select all devices or choose a desktop, mobile, or tablet.
Once that’s done, simply click the ‘Go to Organic Traffic Insights’ button.
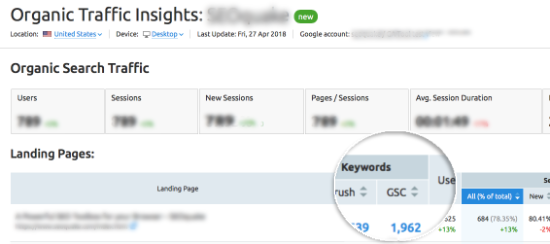
Semrush will now unlock your not provided keywords. All you have to do is click on the blue number under GSC in the Keywords column for any landing page and view the search queries people use on Google.
We hope that this article helped you learn how to unlock your not provided keywords in Google Analytics. You may also want to check out our guide on how to choose the best hosting platform, or our expert comparison of the best email marketing services for small business.
If you liked this article, then please subscribe to our YouTube Channel for WordPress video tutorials. You can also find us on Twitter and Facebook.
The post How to Unlock Your “Not Provided” Keywords in Google Analytics appeared first on WPBeginner.
Dr Crash says:


