
Have you ever wondered if you could replace WooCommerce’s basic sale badge with something more eye-catching (and slightly less boring)?
This is a common question we get from our readers, and we’re happy to tell you that the answer is yes. You absolutely can!
Custom product badges are a fantastic way to highlight special items in your online store. They’re helpful whether you want to showcase new arrivals, mark items on sale, or draw attention to limited-time offers.
In this post, we’ll show you two simple ways to add custom product badges to your WooCommerce store. You can either use a powerful plugin or add some simple code.
Don’t worry. We’ll walk you through each option step by step!
☝ Important Note: To follow this tutorial, you will need to have a fully functional WooCommerce store. If you haven’t set yours up yet (or you are still in the process), check out our ultimate WooCommerce guide for beginners.
What Are WooCommerce Product Badges?
Have you ever noticed those little ‘Sale’ or ‘New’ labels that show up on products while shopping online?
Those are product badges, and they’re incredibly useful for making certain items stand out in your online store.
Think of them as virtual stickers that draw your customers’ attention to important product details like sales, new arrivals, or limited-time offers.
We’ve seen store owners use product badges in really creative ways to showcase special deals, highlight bestsellers, or mark items that are running low on stock.
Now, if you’re already using WooCommerce, you might have noticed it comes with a basic sale badge feature that automatically appears when you reduce a product’s price.
While the WooCommerce sale badge works fine for simple needs, let’s be honest – it’s pretty limited in terms of what you can do with it.
You can’t easily change how the badge looks, add new badge types, or control exactly where they appear on your product images.
Meanwhile, custom product badges allow you to show your brand’s personality more. Most importantly, though, original badges can more effectively draw attention to special products.
That way, you can drive more sales in your online store. 💰
In this guide, we’ll walk you through 2 proven methods to add and customize product badges in WooCommerce. Both approaches will give you complete control over how they look and work.
You can use the quick links below to skip to your preferred method:
Method 1: Use YITH WooCommerce Badge Management (More Customizable)
Let’s start with our favorite tool for adding custom product badges to your WooCommerce store.
We recommend using YITH WooCommerce Badge Management because it makes it super easy to add and customize product badges in your online store.
Plus, we’ve tested many YITH plugins over the years, like the ones for adding subscriptions and product videos, and they always work great for our users.
Want to show a special badge during the holidays? Or maybe display how much money customers will save? This plugin can do all that. You can even set badges to show up at certain times and hide them later.
You can start with either the free or premium version of the plugin. The free version is perfect if you just want to add simple text or image badges to your products.
In this guide, we’ll show you how to use the premium version, but most steps will work the same way for both. Just remember that some cool features, like badges that automatically show discount amounts, only come with the premium version.
✌ Note: The premium version costs $79.99 per year if you want all the features. While this might seem like a lot, we think it’s worth it because you get so many ways to customize your product badges and make them look exactly how you want them.
Ready to start? First, you’ll need to purchase the plugin from YITH’s website.
Then log in to your YITH account, go to the ‘Licenses & Downloads’ tab, and click on the ‘Download Plugin’ button to download the file.
Here’s a tip: don’t close this page after downloading because you’ll need the license key that’s shown there.
Next, go to your WordPress dashboard and install the plugin. For more information, we have a step-by-step guide on how to install a WordPress plugin.
When it’s active, you’ll see a setup screen asking for your YITH email and license key. Just copy these from the YITH website and click ‘Activate license.’
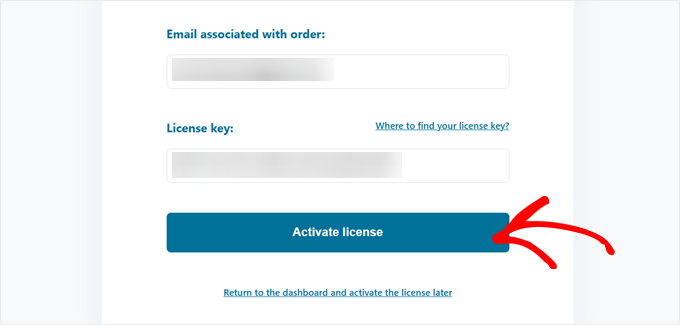
Once you see the message saying your license is active, you’re all set!
Now, click ‘Go to plugin dashboard,’ and you can start creating your first custom badge.

Step 1: Hide the Default WooCommerce Sale Badge
First, we need to hide WooCommerce’s built-in sale badge so it doesn’t clash with our custom product badges.
The process is really simple. Go to your WordPress dashboard and click on YITH » Badge Management. Then, navigate to the ‘General Settings’ tab.
Here, you’ll find an option that says ‘Hide WooCommerce “On sale” badge.’ Go ahead and turn that on.
Then, under ‘Hide “On sale” on:’, select ‘All products’ to make sure the default badge doesn’t show up anywhere in your store.
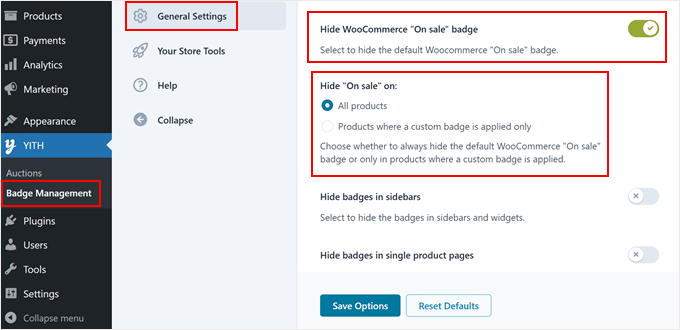
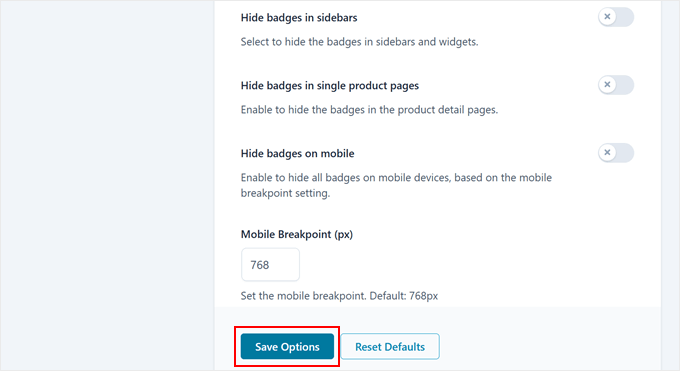
While you’re in the settings, you might notice some other helpful options. You can choose to hide your custom badges in certain places, like the sidebar or single product pages.
This is great if you want to keep your store looking clean and organized. For example, if your mobile site feels too crowded, you can hide badges there, too.
Don’t forget to click the ‘Save Options’ button at the bottom of the page when you’re done.
Step 2: Create Your Custom Badge
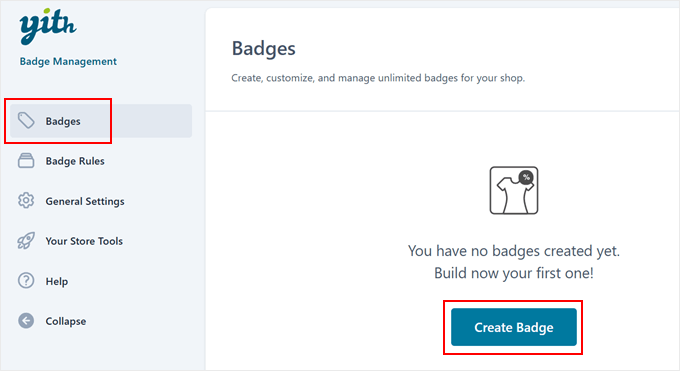
Now comes the fun part: creating your first custom product badge in WooCommerce!
Head over to the ‘Badges’ tab and click the ‘Create Badge’ button to get started.
The plugin gives you 4 different types of badges to choose from: text badge, image badge, CSS badge, or advanced badge for sales products.
Each type lets you create unique ways to highlight your products. For example, if you want to mark products as “New Arrival” or “Vegan Friendly,” the first three options work great.
But here’s a tip: if you’re creating discount badges, we strongly recommend using the advanced option, which automatically updates based on your product’s price changes.
After picking your badge type, give it a name that helps you remember what it’s for.
If you’ve chosen an image, CSS, or advanced badge, you’ll see a whole collection of pre-made badge designs right in the plugin.
You can pick whichever one you like. These ready-to-use badges save you time, and you can still customize them to match the style of your WooCommerce pages.
This plugin really shines in its customization options. Depending on which badge type you picked, you can adjust all sorts of settings to make your badge look perfect on your product images.
Want to change the color? Easy.
Need to adjust how transparent it is? No problem.
You can even rotate the badge or move it around on your products until it’s in just the right spot.
For our example, we made the badge really pop by changing its color to red and placing it in the top right corner of the product image.
These small tweaks can make a big difference in how effectively your badges get people’s attention.
When you’re happy with how everything looks, just click ‘Save badge’ to finish up.
Step 3: Create a Rule to Display Your Badge
Now that we’ve created our custom badge, let’s tell WooCommerce exactly where and when to show it.
Head over to the ‘Badge Rules’ tab and click ‘Set Rule.’
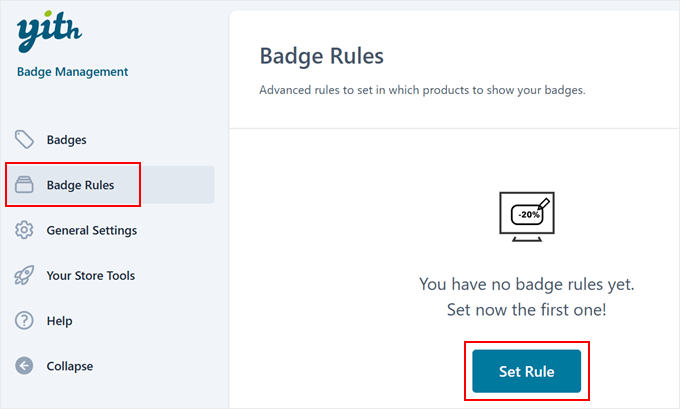
Think of rules as instructions that tell your badges when to appear on your product images.
The plugin gives you 4 main ways to control where your badges show up: products badge, category badge, tag badge, and shipping class badge.
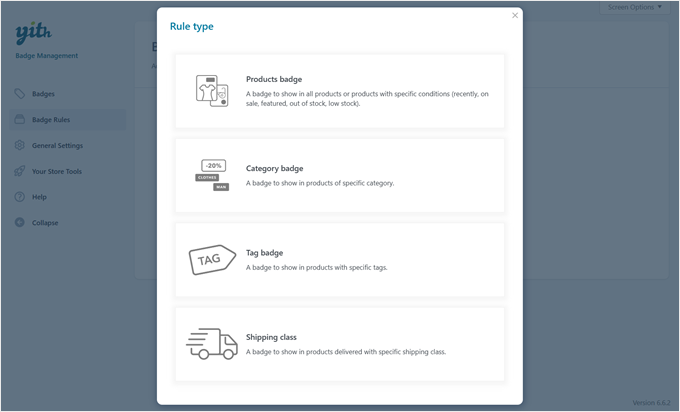
You can choose the ‘Products badge’ rule to add badges to certain items or the ‘Category badge’ rule to cover entire product categories.
Meanwhile, the tag badge rule shows badges on products sharing the same WooCommerce tag, and the shipping class badge rule displays badges based on shipping options.
Each rule targets different product aspects, but they all work in a similar way. So, you just need to pick what works best for your needs.
Let’s use the products badge rule for this example since it’s the most common choice.
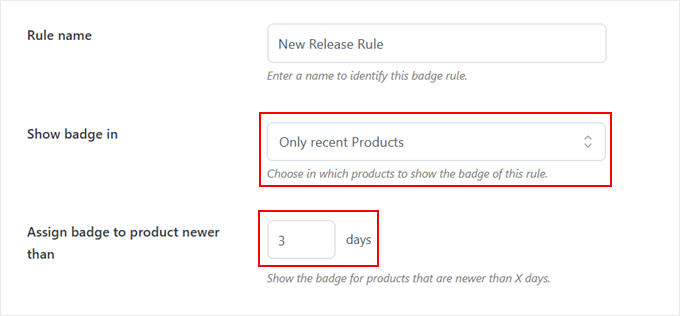
Next, give your rule a straightforward name so you can find it easily later.
Then, look for the ‘Show badge in:’ setting. This is where you decide which products get your badge. You can choose to show it on all products, recent additions, items on sale, featured popular products, or even just products that are in stock.

Let’s say you’re creating a rule for sale items. If you select ‘On sale products,’ then your badge will automatically appear whenever you mark a product as being on sale. It’s that simple!
But some options come with more settings for you to configure. For example, if you pick ‘Only recent Products,’ you can set badges to appear on items added within the last few days (like 7, 14, or 30 days).
This makes it super easy to automatically highlight new arrivals in your store without manually adding badges to each product.
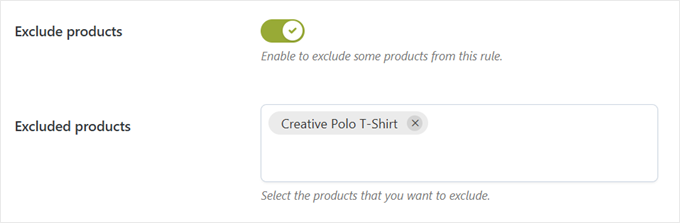
Sometimes, you might want to keep certain products badge-free. That’s where the ‘Exclude products’ setting comes in handy.
Just enable this setting and type in the names of any products you don’t want to show the badge for. These items will stay badge-free even if they match your other rules.
Next, select which badge design you want to use in the ‘Badge to assign’ dropdown.
Now, here’s where it gets really flexible. You can schedule when your badges appear and choose who gets to see them.
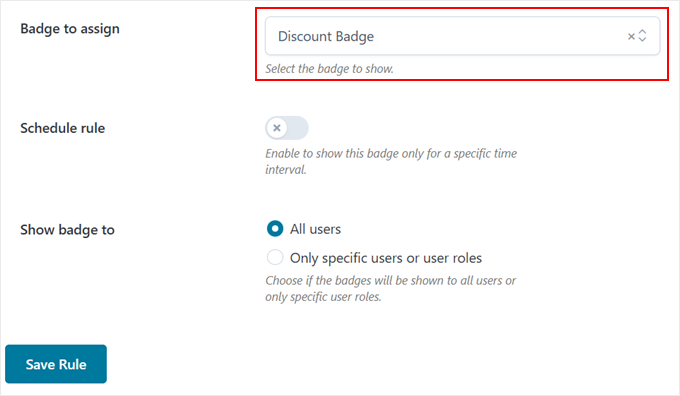
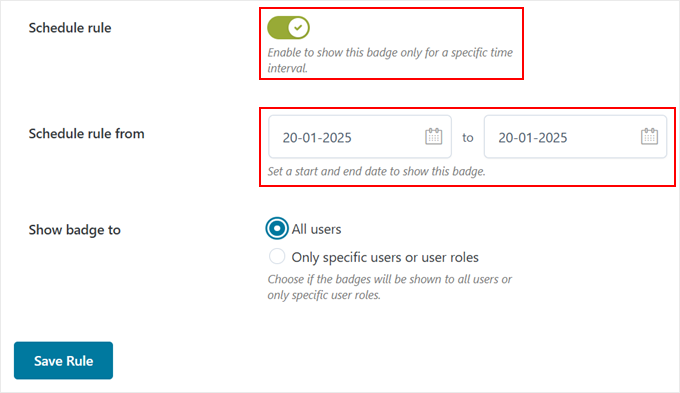
The ‘Schedule rule’ option is perfect for limited-time deals.
When you enable it, the plugin will ask you to set start and end dates for your badges.
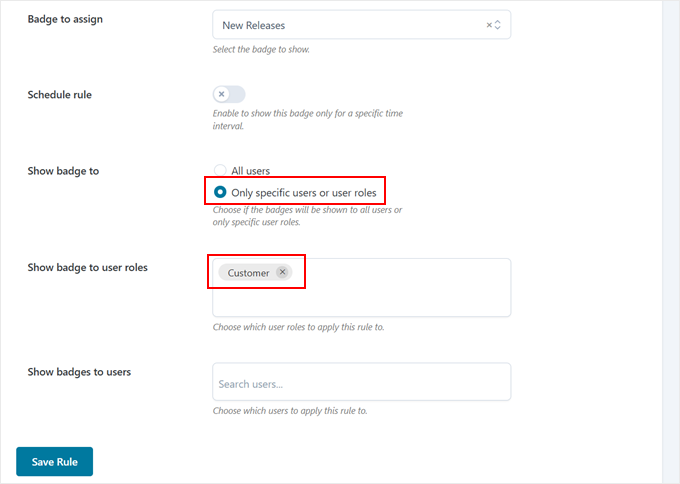
And if you want to show special badges to certain customers, like displaying a “VIP Discount” badge only to the most loyal customers, you can do that, too.
To do this, just select ‘Only specific users or user roles’ in the ‘Show badge to’ setting. Then, type in your preferred user roles or individual usernames below it.
When everything looks right, just click ‘Save Rule,’ and you’re all set!
Feel free to visit your store’s front end to see your new product badges in action.
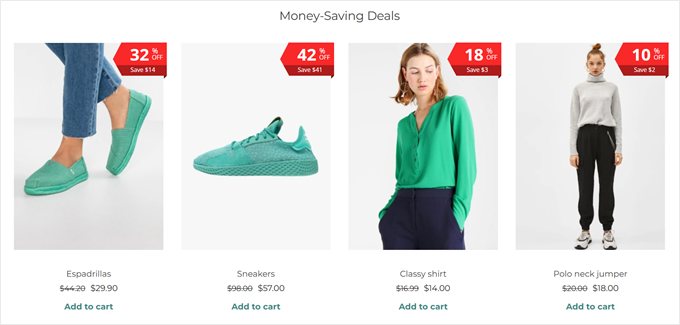
If you’re using the advanced badge type for sale items, you’ll see it displaying both the discount percentage and the actual money saved, helping customers quickly spot the best deals.
💡 Related Post: Looking for more cool tools and strategies to improve your WooCommerce store? Check out our list of the best WooCommerce plugins.
Method 2: Use Custom Code (Free and Simple)
If you don’t need the advanced options from the first method, or if you’re looking for a completely free option, then we have a simple code method that won’t cost you anything.
And if you’re not comfortable with code, don’t worry! We’ll be using the WPCode plugin to make this super easy and safe. It allows you to add custom code snippets in WordPress without being a developer or risking breaking your website.
We’ll use the free version of WPCode for this tutorial because it works perfectly for our needs. That said, there’s a premium version with cool features like AI code generation and testing mode.
For more information, just check out our in-depth WPCode review.
First, you need to install the WordPress plugin in your admin area.
Then, go to Code Snippets » + Add Snippet. Hover over the ‘Add Your Custom Code (New Snippet)’ section and then click on the ‘+ Add Custom Snippet’ button.

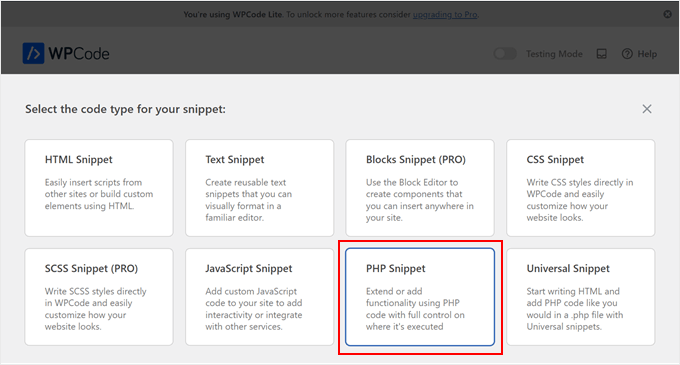
Next, choose ‘PHP Snippet’ when asked about the code type.
This tells WordPress what type of code we’re using.
Now, you have to give your snippet a name that helps you remember what it does.
Since this code will remove the default WooCommerce sale badge and add both new product badges and dynamic discount badges, you might call it something like “Custom WooCommerce Badges.”
Once that’s done, paste the code snippet we’ve provided below in the ‘Code Preview’ box.
This code does something really cool. It automatically calculates discount percentages and shows them on the sales badge. Plus, it adds a “New” badge to products added in the last 7 days.
// Remove default WooCommerce sale flash badge
remove_action( 'woocommerce_before_shop_loop_item_title', 'woocommerce_show_product_loop_sale_flash', 10 );
remove_action( 'woocommerce_after_shop_loop_item_title', 'woocommerce_show_product_loop_sale_flash', 10 );
remove_action( 'woocommerce_before_single_product_summary', 'woocommerce_show_product_sale_flash', 10 ); // Add custom badges to products
add_action( 'woocommerce_before_shop_loop_item_title', 'add_custom_product_badges', 10 );
function add_custom_product_badges() { global $product; // Initialize a variable to track whether a badge has been displayed $badge_displayed = false; // For products with any amount of discount percentage (1% or more) if ( $product->is_on_sale() ) { // Get regular and sale prices $regular_price = floatval( $product->get_regular_price() ); $sale_price = floatval( $product->get_sale_price() ); // Handle variable products if ( $product->is_type('variable') ) { // Get variation prices $regular_price = floatval( $product->get_variation_regular_price( 'max', true ) ); $sale_price = floatval( $product->get_variation_sale_price( 'min', true ) ); } // Calculate discount percentage if regular price is valid if ( $regular_price > 0 ) { $discount_percentage = ( ( $regular_price - $sale_price ) / $regular_price ) * 100; // Display badge if discount is 1% or more if ( $discount_percentage >= 1 ) { echo '<span class="product-badge sale-product">' . round( $discount_percentage ) . '% off!</span>'; $badge_displayed = true; // Badge has been displayed } } } // Only show the "New" badge if no other badge has been displayed if ( ! $badge_displayed ) { // For "New" products added in the last 7 days $post_date = get_the_time( 'Y-m-d', $product->get_id() ); $post_stamp = strtotime( $post_date ); $newness = 7; // Number of days the product is considered new // Check if the product is new if ( ( time() - ( 60 * 60 * 24 * $newness ) ) < $post_stamp ) { echo '<span class="product-badge new-product">New</span>'; $badge_displayed = true; } }
}
Want to adjust how long a product is considered “new”? Just look for the line where it says $newness = 7 in the code. You can change that number 7 to however many days you want, like 14 for two weeks or 30 for a month.
To finish up, click the ‘Inactive’ button until it changes to ‘Active,’ then hit ‘Save Snippet.’
Next, we need to style our badges to make them look great on your products. Let’s add some CSS to adjust their appearance.
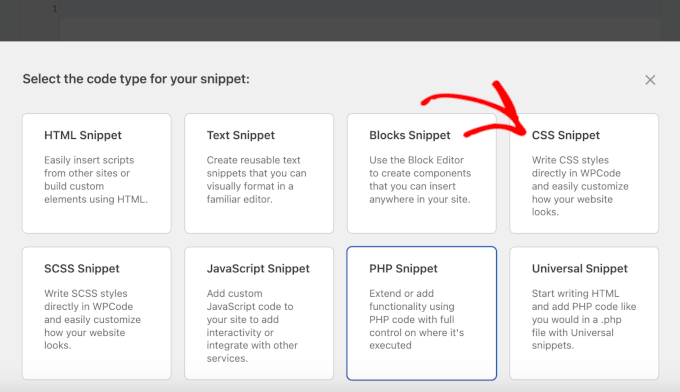
To add a new snippet, follow the same steps as before, but this time, choose ‘CSS Snippet’ when asked.
Name your snippet something descriptive, like “Product Badge Styles.” This will help you find it easily if you need to make changes later.
Here’s the CSS code that will make your badges look professional. Just paste this into the ‘Code Preview’ box:
/* Common styles for all product badges */
.product-badge { position: absolute; top: -10px; /* Position at the top edge */ right: -10px; /* Position at the right edge */ padding: 12px 16px; border-radius: 50%; color: #ffffff; font-size: 16px; font-weight: bold; z-index: 99; box-shadow: 0 2px 5px rgba(0, 0, 0, 0.3);
} /* Styles for the "New" badge */
.new-product { background-color: #4CAF50; /* Green background */
} /* Styles for the "Sale" badge */
.sale-product { background-color: #FF0000; /* Red background */
}
Let’s break down what you can customize in this code.
Want your badges in a different spot? To do this, you can change the top and right values. For example, changing top: -10px to top: 10px will move the badge down.
Don’t like the colors? It’s super easy to change them. Just find the background-color lines and replace the color codes.
For instance, if you want a blue sale badge instead of a red one, change #FF0000 to #0000FF. You can also make the badges bigger or smaller by adjusting the font-size value.
Want to learn more about tweaking these styles? Check out our beginner-friendly guide on CSS in WordPress.
Once you’re done, just click the ‘Inactive’ button to make it ‘Active,’ then hit ‘Save Snippet.’

That’s it!
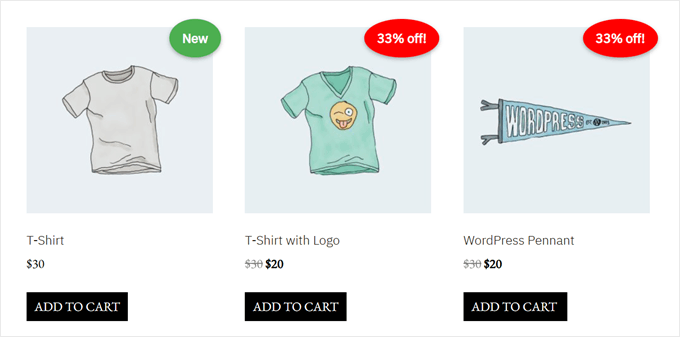
Your badges should now appear on your product images. Here’s an example of what ours looks like using our CSS code:
Discover More WooCommerce Tips and Tricks
Now that you know how to display product badges in WooCommerce, you might want to explore other ways to improve your online store. Here are some helpful guides we recommend:
- Boost sales with smart upselling – Learn how to strategically promote related products and increase your average order value through effective upsell tactics.
- Reward customer reviews with coupons – Discover how to automatically send discount coupons to customers who leave product reviews, encouraging more feedback and repeat purchases.
- Display smart product recommendations – Find out how to show product suggestions to skyrocket your WooCommerce sales.
- Add advanced product filtering options – Learn to help customers find exactly what they’re looking for with customizable product filters that make shopping easier and faster.
- Create a customer wishlist feature – See how adding a wishlist function can boost engagement and give shoppers a reason to return to your store while providing valuable insights into customer preferences.
- Hide prices in WooCommerce – Learn how to hide pricing for wholesale customers, online catalogs, and luxury goods and ask shoppers to contact you or log in instead.
We hope this article has helped you learn how to add product badges in WooCommerce. You may also want to check out our expert picks of the best WooCommerce product grid plugins and our guide on how to speed up WooCommerce performance.
If you liked this article, then please subscribe to our YouTube Channel for WordPress video tutorials. You can also find us on Twitter and Facebook.
The post How to Add Product Badges in WooCommerce (Quick and Easy) first appeared on WPBeginner.
Dr Crash says:

