Do you want to learn how to select and use nested blocks in WordPress?
The WordPress Gutenberg nested blocks feature allows you to add multiple blocks within a parent block. Then, you can customize different block elements at the same time, organize post content efficiently, and access more design flexibility.
In this article, we will show you how to easily select and use WordPress nested blocks.
What Are WordPress Nested Blocks?
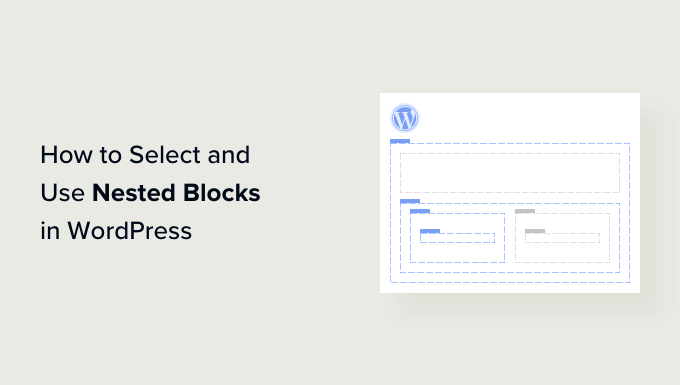
The WordPress Gutenberg nested block feature allows you to insert (or ‘nest’) one or more blocks within another block.
Nested blocks help you create more complex layouts on your WordPress website by adding multiple blocks inside each other. This allows for more flexibility when designing and formatting content for pages and posts.
For instance, you can nest multiple Image blocks within a Group block to display a set of photos from a particular event or a series of artworks created using a particular technique.

Moreover, the nested block feature allows you to edit individual blocks separately. This means that you can customize each block according to your needs without affecting the other blocks. In turn, this results in better content organization, makes your content more attractive, and streamlines your content creation process.
That being said, let’s see how you can easily select and use WordPress Gutenberg nested blocks.
How to Use WordPress Nested Blocks
You can easily nest multiple blocks together using the Group or Columns block in the Gutenberg block editor.
First, you need to open up an existing or new post in the block editor from the WordPress admin sidebar.
From here, simply click on the ‘+’ button in the top left corner of the screen and find the ‘Group’ block. Upon clicking it and adding it to the page, you will need to select a layout for the blocks that you will nest together.
For this tutorial, we will be selecting the ‘Group’ layout.
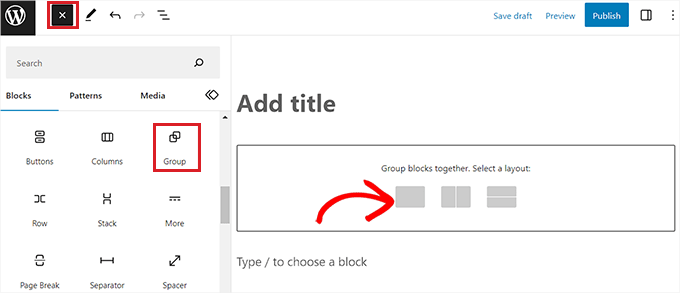
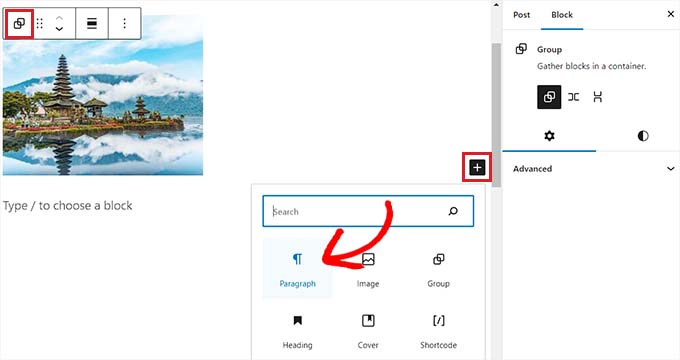
Next, simply click on the ‘+’ button on the screen to start adding content within the parent block.
For the sake of this tutorial, we will be adding an Image block.
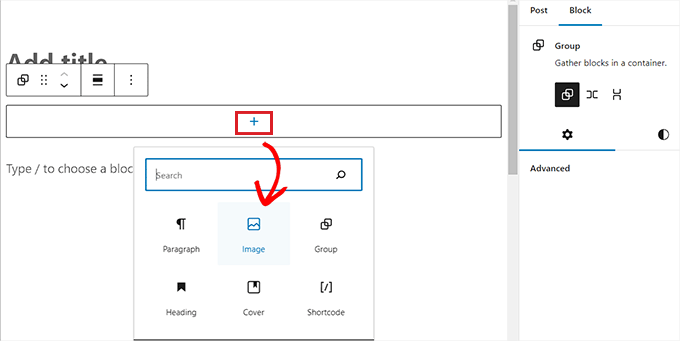
Upon adding the Image block, just click the ‘Group’ button in the block toolbar at the top to select the parent block.
Next, you need to click the ‘+’ button to open up the block menu, from where you can choose other blocks to add.
How to Configure WordPress Nested Block Settings
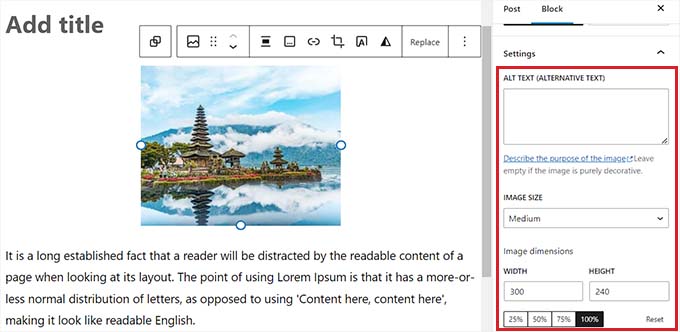
Once you have nested multiple blocks, you can configure their individual settings by clicking on each block. This will open up the block settings in the right column on the screen.
From here, you can adjust the background color, text color, and size of the individual blocks without affecting the other blocks that are nested within it.
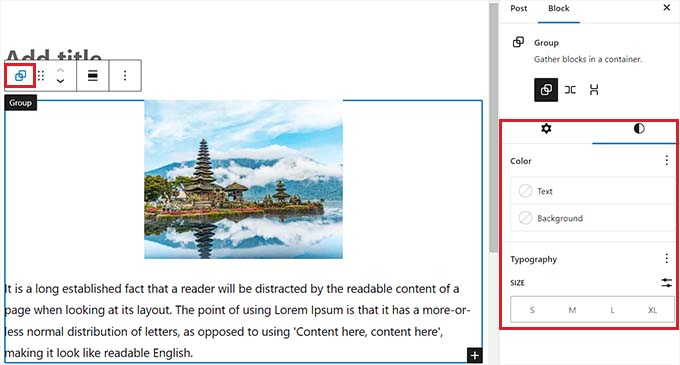
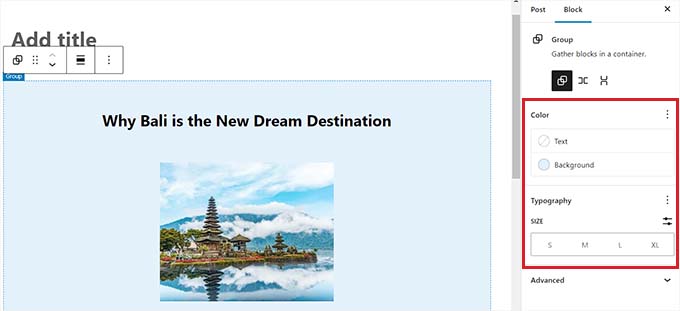
To configure the settings of all the nested blocks together, you will have to click the ‘Group’ button in the block toolbar at the top. This will open up the parent block settings in the right column.
You can now configure the justification, orientation, background color, text color, and typography of all the nested blocks.
Keep in mind that these settings will affect all the blocks nested within the parent block.
You can also convert an existing individual block into nested blocks by clicking the ‘Options’ button in the top toolbar of any block.
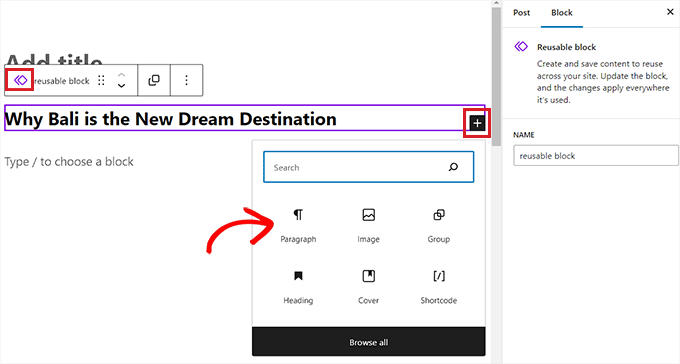
This will open up a menu prompt, where you need to select the ‘Create Reusable block’ option.
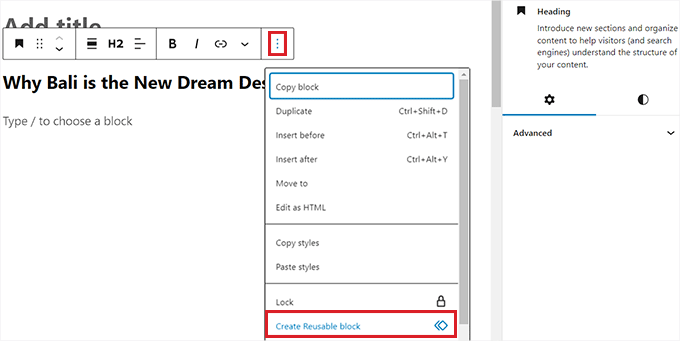
Once you have done that, a new reusable block will be created where you can add multiple blocks.
After you are done, don’t forget to click the ‘Publish’ or ‘Update’ button to save your changes.
In our example, we have nested a Title, Image, and Paragraph block within a Group block. This is how the nested blocks looked on our demo website.

Bonus: Use the Wayfinder Plugin to Easily Select Nested Blocks
Sometimes, it can be difficult to select an individual block and configure it when there are multiple blocks nested together.
Luckily, the Wayfinder plugin makes it super easy to select nested blocks from a parent block and even tells you the type and class of the blocks.
First, you will need to install and activate the Wayfinder plugin. For more instructions, you may want to see our guide on how to install a WordPress plugin.
Upon activation, head over to the Settings » Wayfinder page from the WordPress admin sidebar.
Once you are there, all the settings will already be activated. You simply need to uncheck the box next to the settings that you don’t want to use.
For example, if you want Wayfinder to display block types for all the blocks in the editor, then keep the box checked next to the ‘Display block type’ option.
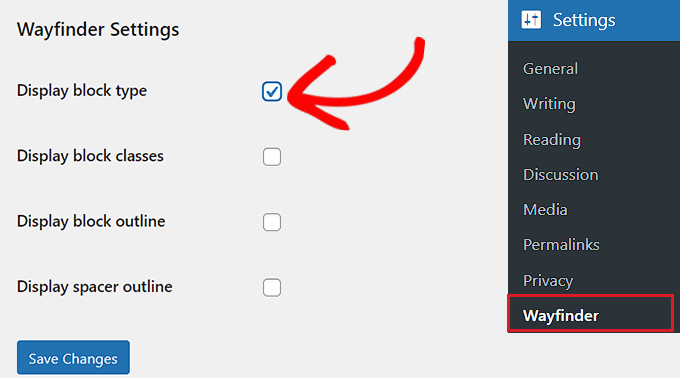
However, if you don’t want the plugin to display block classes, simply uncheck the box next to that option.
After configuring the settings, don’t forget to click the ‘Save Changes’ button.
Next, you need to open up an existing or new post from the WordPress admin sidebar.
Once you are there, hovering your mouse over any block will show an outline with its name. You will also be able to see the outline and name of any nested blocks within the parent block.
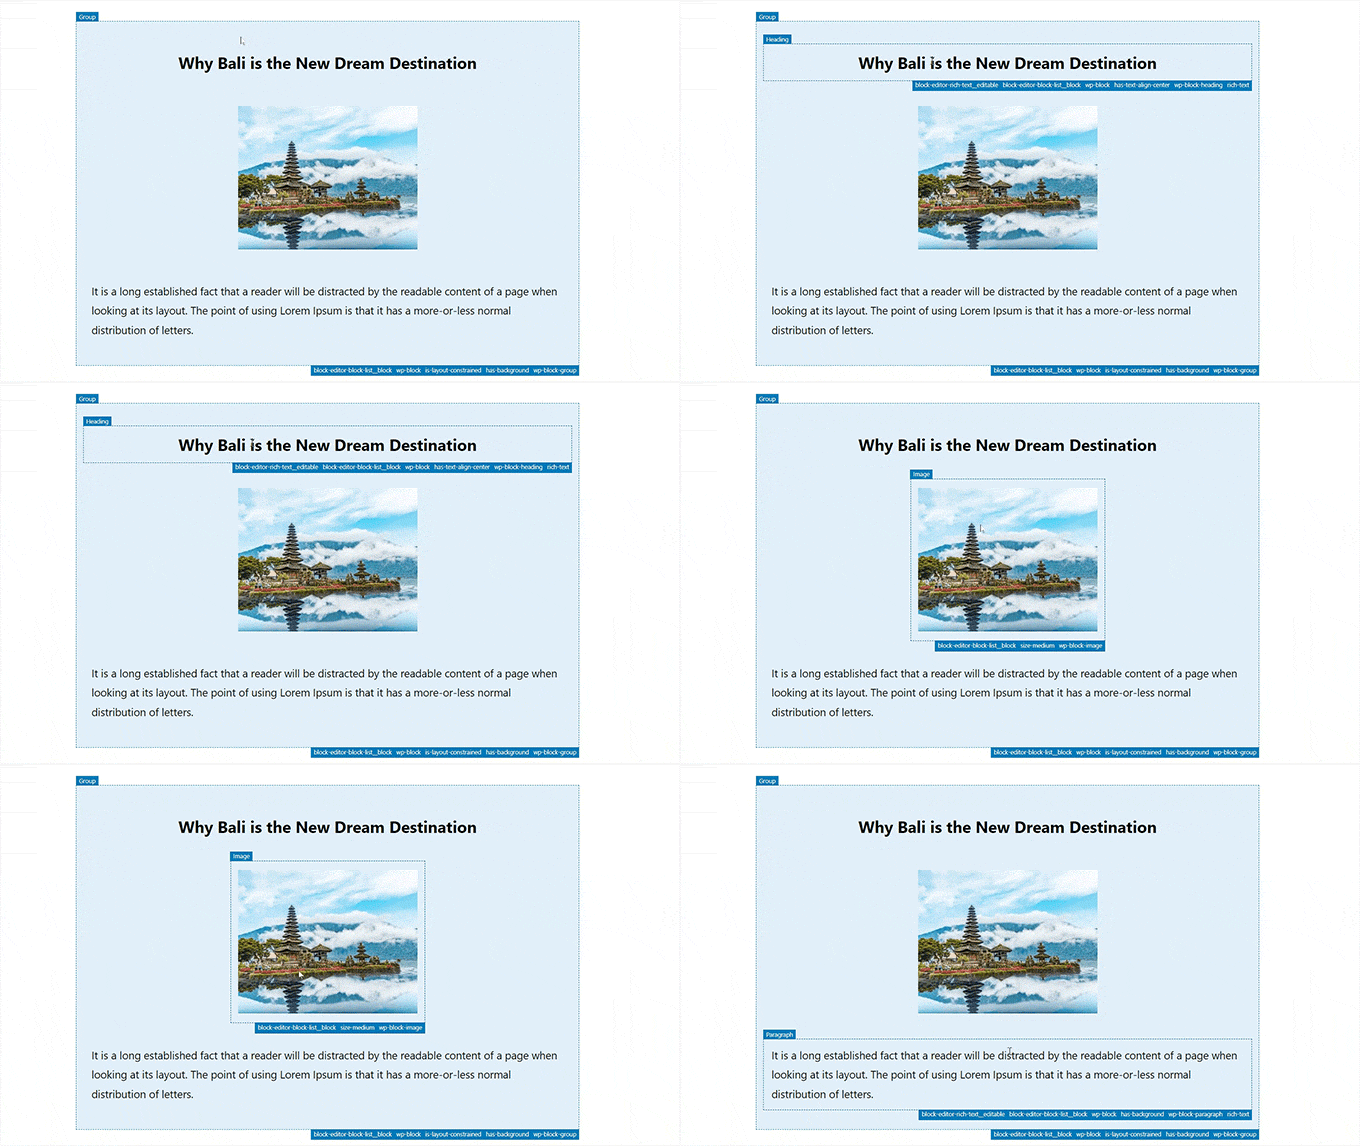
This will help you identify all the different blocks that are nested within a Group or Columns block.
From here, you can easily select an individual block from the parent block to configure its settings.
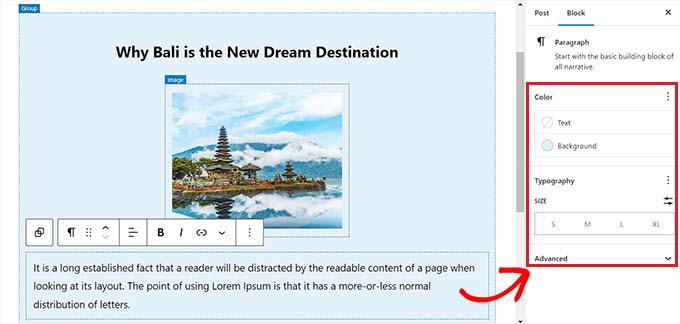
You can also select all the nested blocks at the same time by simply clicking on the ‘Columns’ or ‘Group’ heading. This will open up the parent block settings in the right column.
Once you have configured the block settings, simply click the ‘Update’ or ‘Publish’ button to save your changes.
We hope this article helped you learn how to select and use WordPress nested blocks. You may also want to see our tutorial on how to change block height and width in WordPress and our top picks for the must-have WordPress plugins to help grow your site.
If you liked this article, then please subscribe to our YouTube Channel for WordPress video tutorials. You can also find us on Twitter and Facebook.
The post How to Select and Use Nested Blocks in WordPress first appeared on WPBeginner.
Dr Crash says:
