
Are you looking for ways to validate your customer’s phone numbers?
Phone number verification helps filter invalid leads before they’re added to your database. This way, you’ll save time and cost by only removing fake or inactive numbers.
In this article, we will show you how to validate customer phone numbers using different ways.

Why Validate Customer Phone Numbers?
If you collect customer phone numbers as part of lead generation, then it is important to validate the contact information.
Sometimes, a user might make an error when entering the phone number, providing a fake number, or the number is no longer active. It’s important to verify this information and make sure that your efforts don’t go to waste.
That’s because you can use a valid phone number to provide customer support through a business phone service, deliver shipping details, order information, marketing and sales-related activities, and more.
Plus, you’ll also reduce costs by removing invalid contact information. This is really useful when you’re using marketing tools to send SMS messages, emails, and other messages, as you’ll save credits.
That said, let’s see how to validate customer phone numbers in WordPress. We’ll cover different methods, so you can click the links below to jump ahead to any section.
Method 1: Validate Phone Numbers using WP Simple Pay
If you’re selling digital products online, then you can verify the customer’s phone number using WP Simple Pay. It is the best Stripe payment plugin for WordPress and allows you to accept online payments without setting up a shopping cart.
The plugin offers a phone number validation feature that confirms if a user has entered the phone number correctly. This way, you can reduce the likelihood of typos and errors.
For this tutorial, we will use the WP Simple Pay Pro plan because it includes the phone number validation feature. However, there is also a free version of WP Simple Pay available.
First, you’ll need to install and activate the WP Simple Pay plugin. If you need help, then please see our guide on how to install a WordPress plugin.
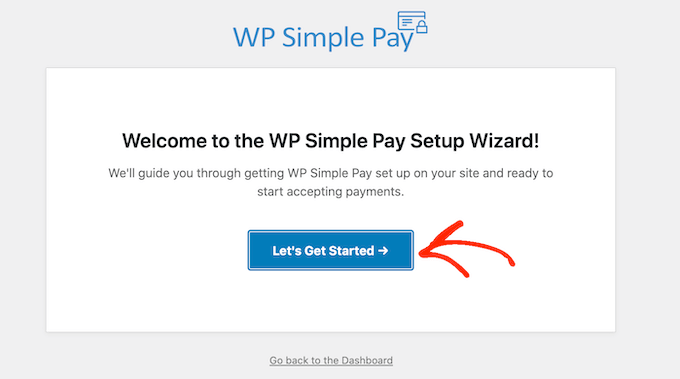
Upon activation, you’ll see the WP Simple Pay setup wizard. Simply click the ‘Let’s Get Started’ button to continue.
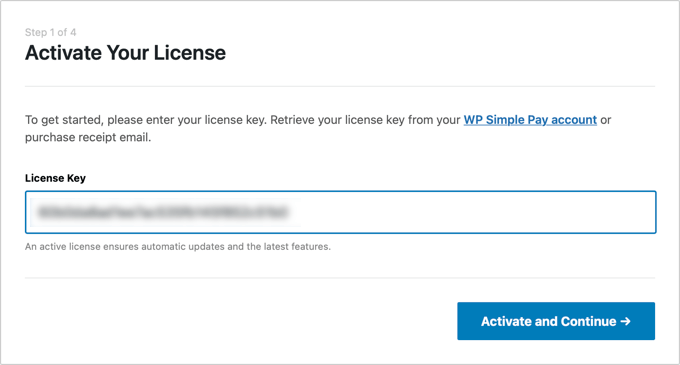
On the next screen, you’ll need to enter the license key. You can easily find the key in your WP Simple Pay account area.
After entering the license key, you can click the ‘Activate and Continue’ button.
Next, you must connect your Stripe account with WP Simply Pay.
Go ahead and click the ‘Connect with Stripe’ button to move forward.
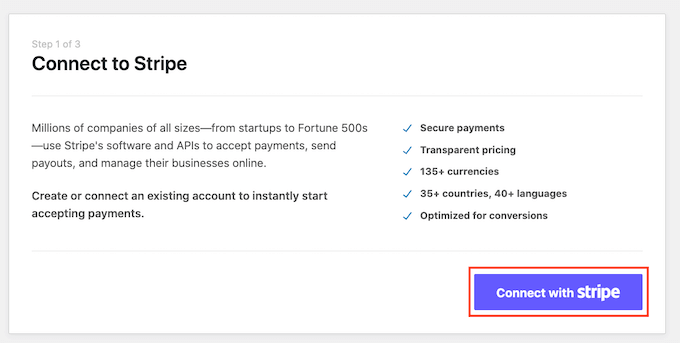
You’ll now need to login to your Stripe account and follow the onscreen instructions to connect your account.
Do note that Stripe only works with sites with SSL encryption. Most WordPress hosting services provide free SSL certificates. However, you may also want to see our guide on how to move a website from HTTP to HTTPS.
Once you’ve connected your Stripe account, the setup wizard will ask you to configure the email settings. You can enable options to receive payment receipts, upcoming invoices, and payment notifications.
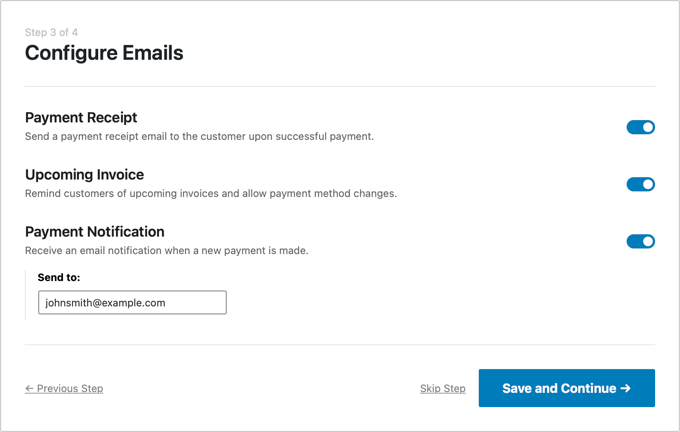
Go ahead and click the ‘Save and Continue’ button when you’re done.
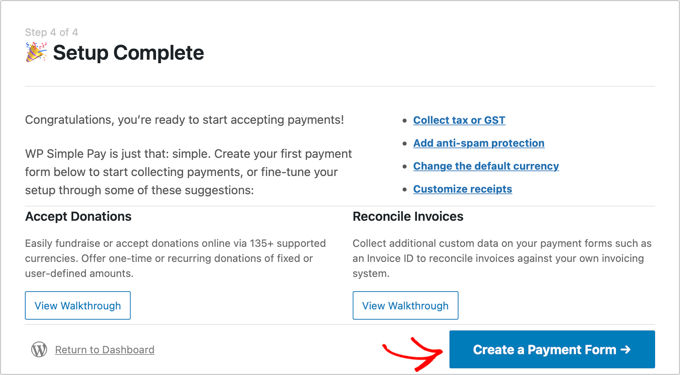
Now, you’re ready to create a payment form in WP Simple Pay. Simply click the ‘Create a Payment Form’ button.
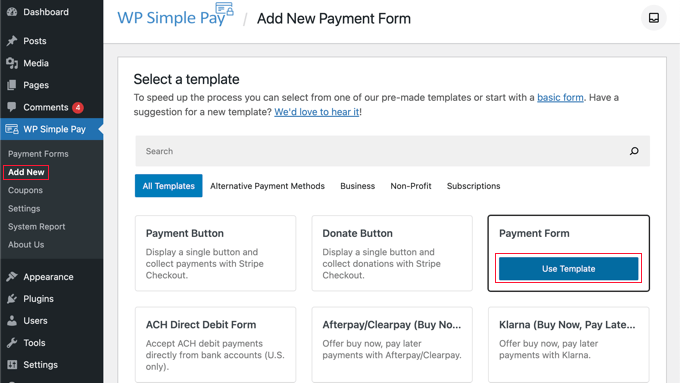
WP Simple Pay offers multiple form templates to choose from. You can simply add a payment button, donate button, or set up all types of payment forms.
For this tutorial, we will select the ‘Payment Form’ template. You can hover over the template and click the ‘Use Template’ button.
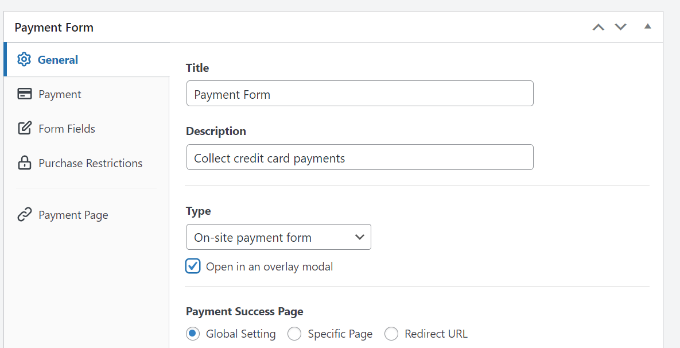
Next, you can edit your payment form.
In the General settings tab, you’ll see options to change the form title, description, form type, payment success page settings, and more.
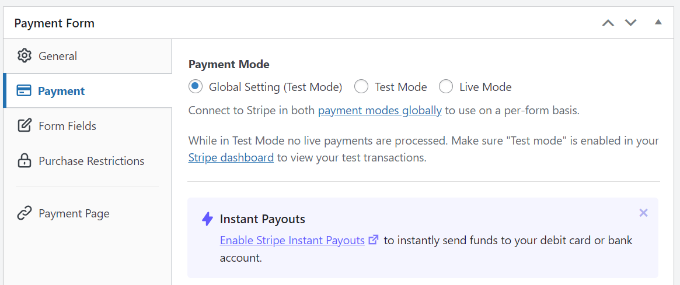
After that, you can switch to the ‘Payment’ tab.
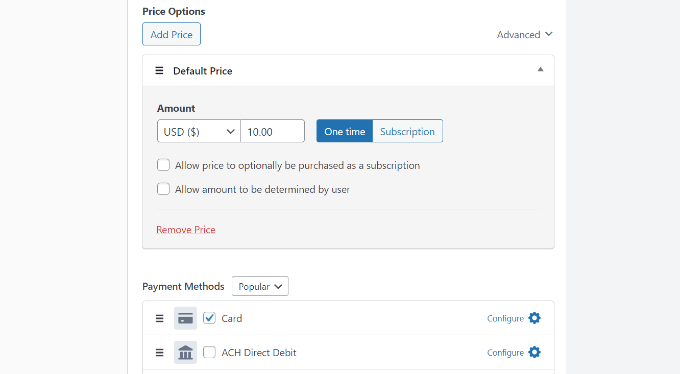
Here, you will see different settings to edit the pricing options.
You can scroll down to add prices for your products. Plus, there are also settings to choose the subscription type. For instance, you can make it a one-time payment or a recurring subscription.
WP Simple Pay also lets you add different payment methods. You can accept payments through credit/debit cards, ACH direct debit, Aplipay, Klarna, and more.
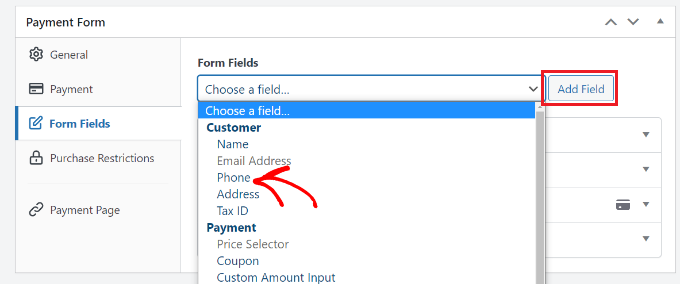
After that, you can switch to the Form Fields tab to add or remove different fields in your payment form.
By default, WP Simple Pay won’t add the phone number field.
To add the field, simply click the Form Fields dropdown menu and select the ‘Phone’ field. Once you’ve selected it, click the ‘Add Field’ button.
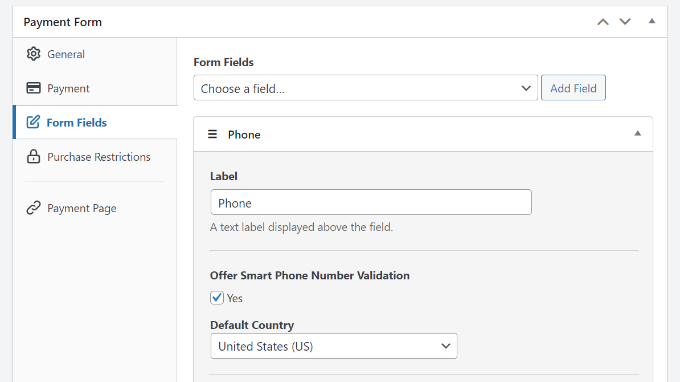
Next, you can expand the Phone field and further customize it, like editing its label and making it a required field.
For phone number verification, make sure that you enable the ‘Offer Smart Phone Number Validation’ option and select the default country.
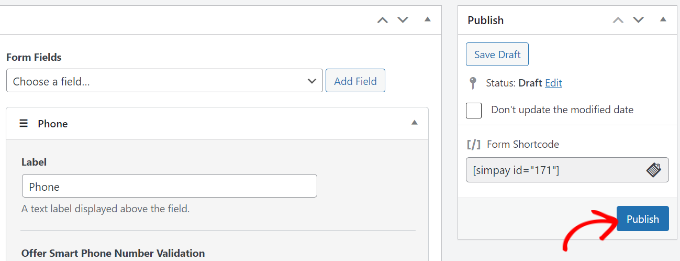
Aside from that, you can edit other form fields and rearrange their order by simply dragging them up or down.
Once you’re done editing, go ahead and click the ‘Publish’ button.
Next, you can add the payment form on any page or post on your WordPress site.
Simply edit or add a new post or page. Once you’re in the content editor, click the ‘+’ icon and add the ‘WP Simple Pay’ block.
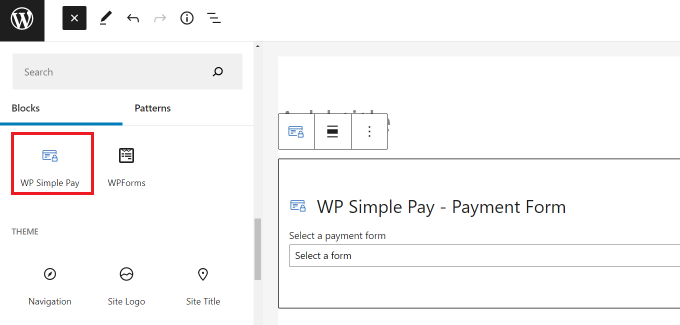
Now, click the dropdown menu in the block to select your payment form. Once that’s done, simply publish or update your page.
You can now visit your website to see the payment form with the phone number validation option.
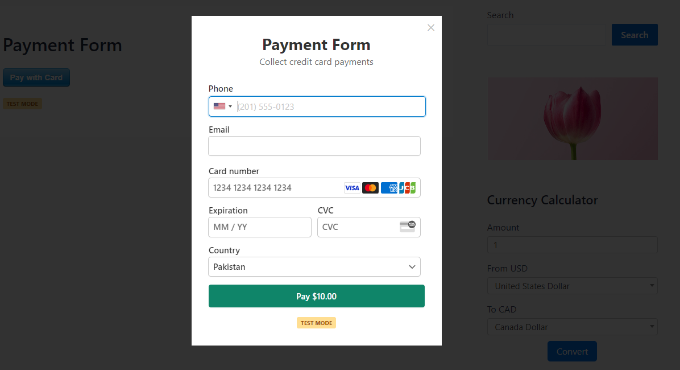
When a user enters an invalid phone number, they will not be able to move ahead in the form.
Method 2: Validate Phone Numbers using Formidable Forms
Another way to verify your customer’s phone numbers is using Formidable Forms. It is one of the best contact form plugins for WordPress. It offers powerful features and helps you create complex forms, like mortgage calculators.
Formidable Forms lets you add a phone number field to your forms and helps validate the numbers. You can also select a format, so users enter the correct information without making any mistakes. This is really useful if you’re collecting leads or gathering user information on a WordPress blog.
For this tutorial, we will be using the Formidable Forms Pro version because it includes advanced settings for phone validation.
First, you’ll need to install and activate the Formidable Forms Lite plugin, which acts as a base for advanced premium features. For more details, please see our guide on how to install a WordPress plugin.
Upon activation, you can head to the Formidable » Global Settings. Here, you will need to click the ‘Click to enter a license key manually’ link.
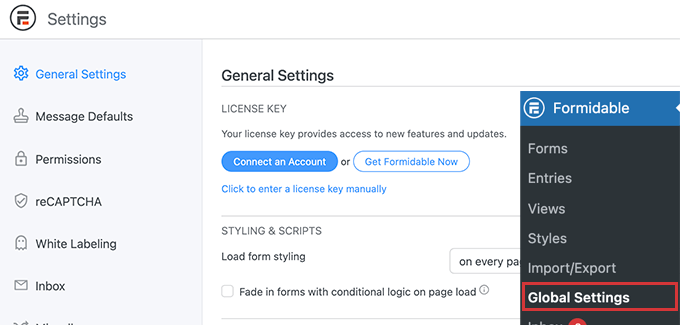
After that, simply enter the license key in the box and click the ‘Save License’ button.
You can find the license key in your Formidable Forms account area.

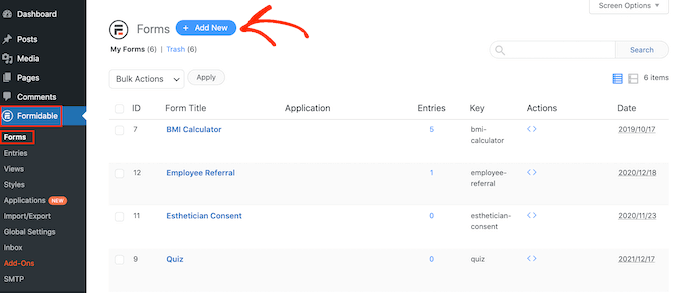
Now, you’re ready to create a new WordPress form.
Next, you can go to Formidable » Forms from the WordPress dashboard and click the ‘+ Add New’ button.
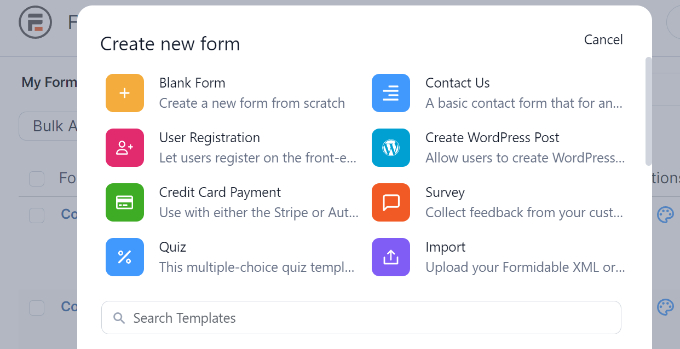
After that, Formidable Forms will ask you to select a form template. There are multiple templates to choose from.
For this tutorial, we will use the ‘Contact Us’ form template.
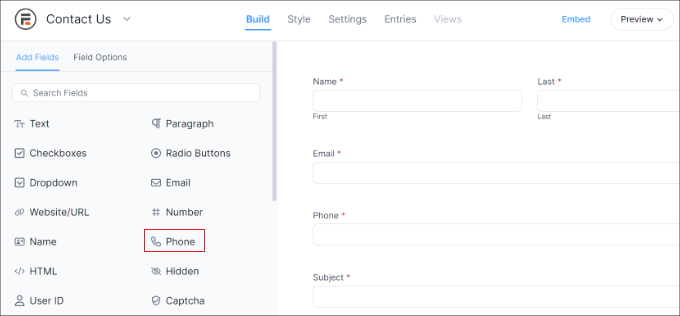
Next, you’ll see the drag-and-drop form builder, where you can edit your contact form.
From the panel on your left, simply drag the ‘Phone’ field and drop it onto the template.
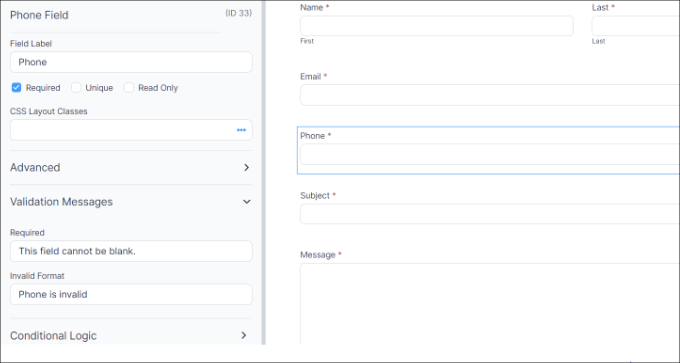
You can now select the Phone form field and further customize it.
For instance, there are options to change its label, make it a required field, and enter CSS classes.

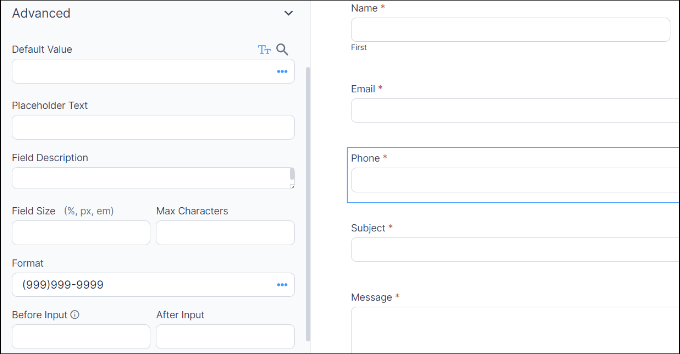
Next, you can open the ‘Advanced’ tab from the panel on your left.
Here, you can set the format for your phone number. This will help users to fill in the contact information correctly. Besides that, there are other options to add placeholder text, edit the field size, add max characters, and more.
Lastly, you’ll need to switch to the ‘Validation Messages’ tab from the left panel.
In this section, you can enter the message that customers will see when they enter an invalid format.
Other than that, Formidable Forms also offers different settings for your WordPress form.
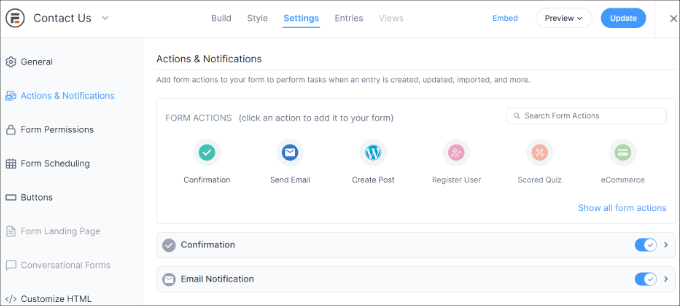
You can switch to the ‘Setting’ tab from the top to view them. For instance, there are options to edit the actions and notifications for your form.
By default, Formidable Forms will send a confirmation message when a user submits a form. Plus, your website admin will also receive an email that a new form has been submitted.
After making changes to the form settings, you can embed in any page or post.
Simply click the ‘Embed’ button at the top. A new window will now open where you’ll need to select an existing page, create a new page, or manually insert the form on your website.
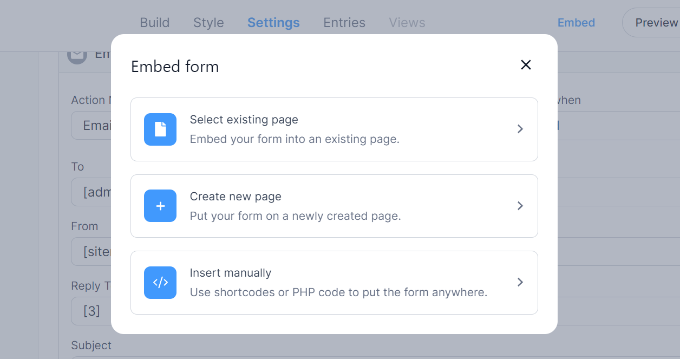
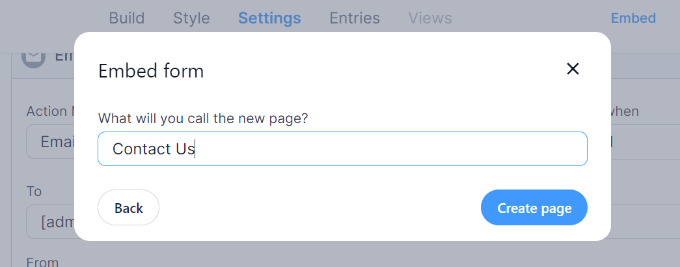
For this tutorial, we will select the ‘Create new page’ option.
Next, you’ll need to enter a name for the new page. Once that’s done, click the ‘Create page’ button.
You should now see a preview of your form in the WordPress block editor.
Go ahead and publish your page. You can visit your website to see the contact form with the phone number validation field.
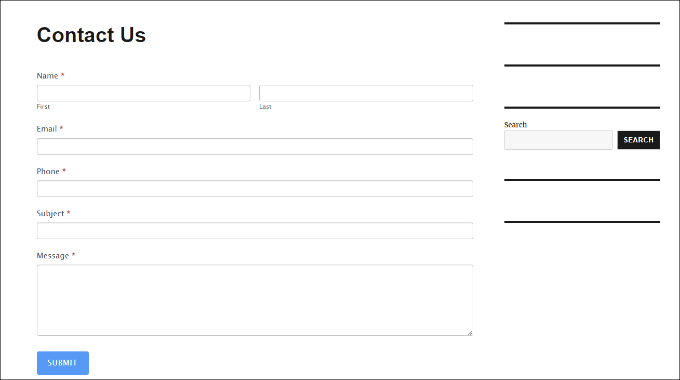
Now, if someone enters the phone number with an invalid format, they won’t be able to submit the form and will see the validation message.
We hope this article helped you learn how to validate customer phone numbers. You may also want to see our guide on the best live chat software for small businesses and our ultimate guide to WordPress SEO.
If you liked this article, then please subscribe to our YouTube Channel for WordPress video tutorials. You can also find us on Twitter and Facebook.
The post How to Validate Customer Phone Numbers (2 Ways) first appeared on WPBeginner.
Dr Crash says:


