Are you looking to learn how to customize your WordPress theme design?
Many WordPress themes come with built-in options to easily customize the design and layout. You can also add more customization options using plugins.
In this article, we’ll show you how to easily customize your WordPress theme and make it your own.

Following is a list of topics we’ll cover in this guide:
- Why Customize Your WordPress Theme
- Using the Default Theme Customizer
- Customize WordPress Theme with Full Site Editor
- Using Legacy Theme Customizer in WordPress
- Customize Your WordPress Theme with Full Control
- Customize Individual Pages with SeedProd Page Builder
- Create a Custom WordPress Theme
Ready? Let’s get started.
Why Customize Your WordPress Theme
WordPress themes are designed for generic website niches. For instance, there are themes for different types of small business websites, photographers, bloggers, and more.
After picking a theme, you’ll need to customize it to your own requirements.
For instance, you may want to use your own custom logo, brand colors, tweak the layout a little bit, change font sizes, use your own images, and more.
Some of these customizations are necessary to make a website that truly represents your business and brand, and doesn’t just look like everyone else’s.
Depending on which WordPress theme you choose, these options may vary a lot from one theme to another.
For instance, some themes may give you an option to move the sidebar from right to left while others may not even have a sidebar in their layout.
That being said, let’s take a look at how to easily customize your WordPress theme without writing any code, and take it to the next level without breaking your website.
Using the Default Theme Customizer
WordPress came out with a full-site editing experience in WordPress 5.9.
There are currently not very many themes on the market with full support for the new full-site editing feature.
However, we’ll show you how to use it to customize your WordPress theme. We’ll also show you how to use the legacy theme customizer as well as the complete WordPress site builder tool that we recommend for beginners.
Using the Full Site Editor in WordPress to Customize a Theme
If your WordPress theme supports full site editor, then you’ll see the Editor menu under the Appearance option in the WordPress admin sidebar.
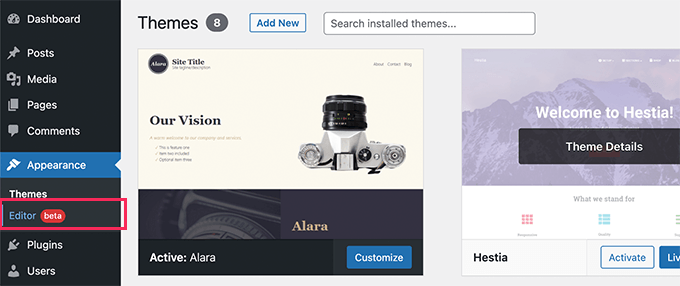
Clicking on it will launch the full site editor.
This editor is just like the block editor you use to write WordPress posts and pages.
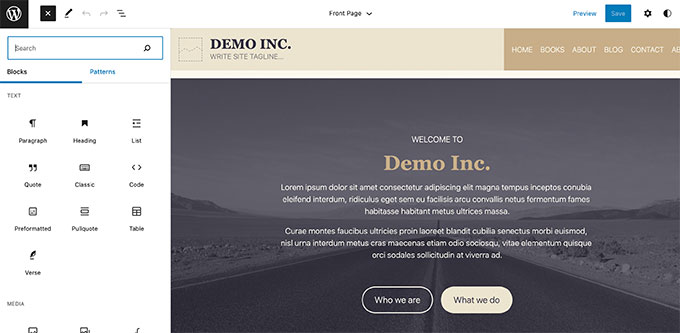
You can add new elements to your templates by adding blocks. Apart from regular blocks, you can also use site-wide blocks like navigation, logo, post query loops, and more.
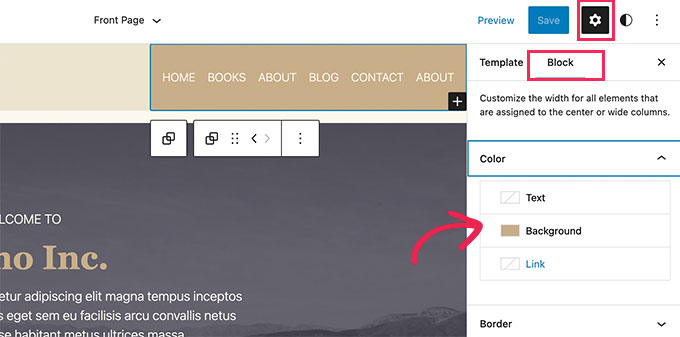
Each block comes with its own settings, where you can style it differently and change colors, typography, and other options.
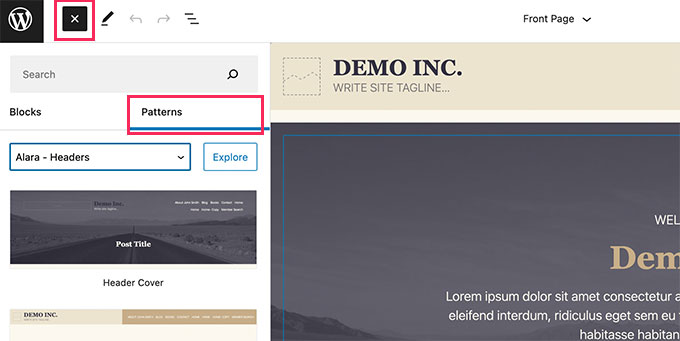
Your WordPress theme may also provide additional patterns that you can use to quickly create different sections.
You can find these under the Patterns tab.
You can edit different areas of your website by clicking on the template name at the top and choosing a different template to edit.
To view more templates, you can click on ‘Browse all templates’ at the bottom.

This will show you a list of templates available in your theme that you can edit.
Simply click on a template name to open it in the editor.
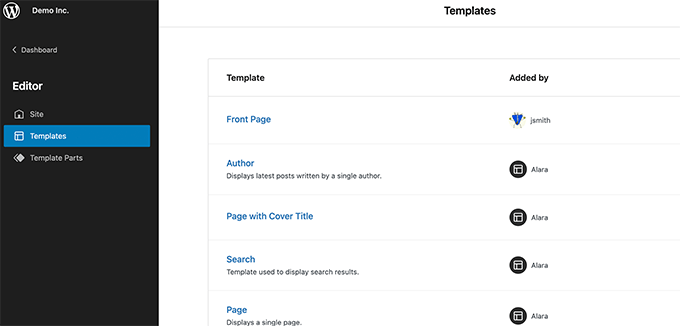
The template will open in the same block editor.
From here, you can edit it any way you want.
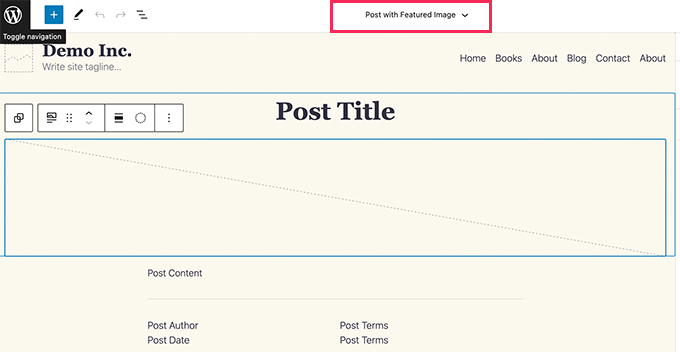
Once you are satisfied with the changes you made to your theme, simply click on the Save button at the top to apply your changes.

The full site editor is a powerful and flexible way to customize your WordPress theme.
However, it is a brand new feature and many WordPress themes don’t support it at the moment.
Using Legacy Theme Customizer in WordPress
If your WordPress theme doesn’t support the full site editor yet, then it will use the legacy theme customizer feature in WordPress.
In that case, you can customize your theme by going to the Appearance » Customize page.
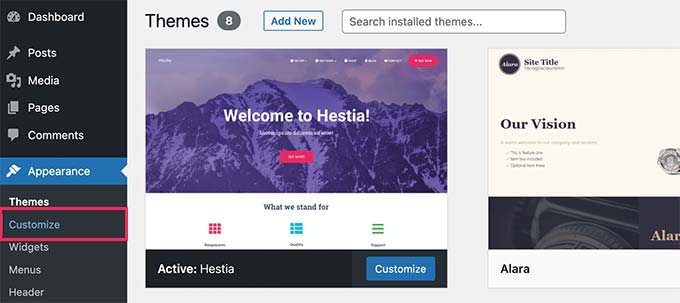
Clicking on it will launch the Theme Customizer.
You’ll see customization settings on the left side of your screen, and the live preview of your website to the right.
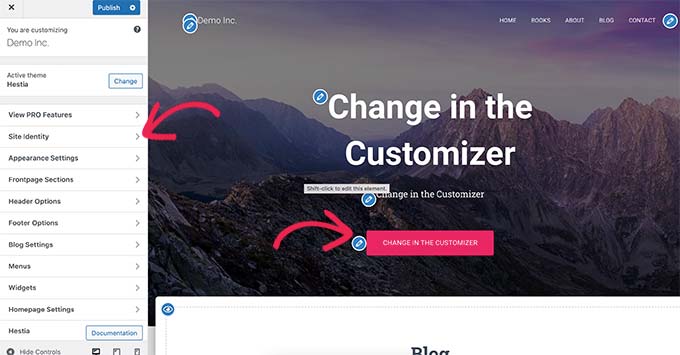
The editable areas of your website will be highlighted with a pencil icon on the live preview.
You can also expand each option on the left panel to change its settings.
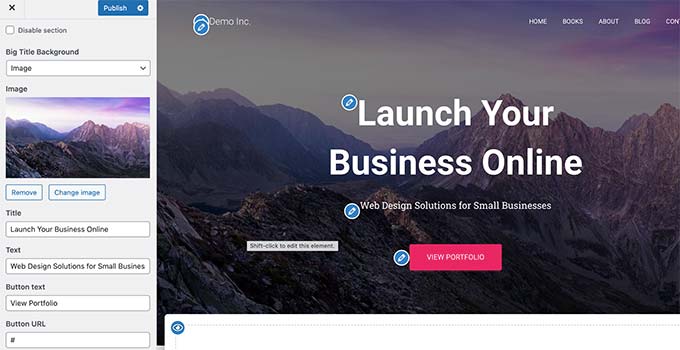
The number of options in the left panel will vary from one theme to another.
However, most themes will support the basics like your site’s tagline, widgets, homepage settings, menus, and Additional CSS settings.
For more details, view our guide on how to use the WordPress theme customizer to edit your theme.
Customize Your WordPress Theme with Full Control
The default WordPress theme customization options depend on which WordPress theme you are using.
If your theme supports a feature, you may be able to customize it using customizer or full site editor. This limits your ability to customize a WordPress theme.
What if you want to further customize or even create a custom WordPress theme for your website?
This is where SeedProd comes in.
It is the best WordPress website builder on the market. You can use it to create beautiful website layouts and even create a custom theme without writing any code.
First thing you need to do is install and activate the SeedProd plugin. For more details, see our step by step guide on how to install a WordPress plugin.
Upon activation, you need to enter your license key. You can find this information under your account on the SeedProd website.

After that, you need to choose whether you want to create a custom WordPress theme or create individual pages for your website.
SeedProd can do both and we’ll show you both approaches.
Customize Individual WordPress Pages with SeedProd
This approach is quite flexible and allows you to easily create on-demand page layouts.
For instance, you can design a custom landing page for a product or marketing campaign, or create a thank you page to send visitors after they sign up for your email list.
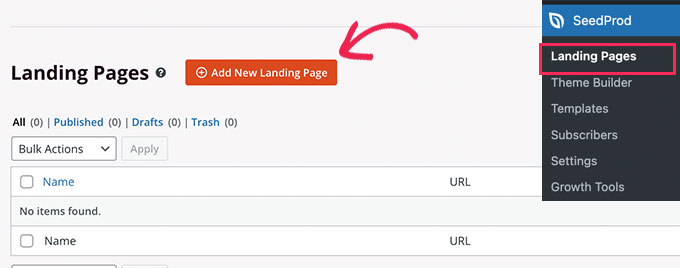
Simply head over to SeedProd » Landing Pages page and then click on the Add New Landing Page button.
Next, you need to choose template for your page.
This template is used as an starting point, so you can change everything inside it later on. Alternatively, you can start with a blank canvas.
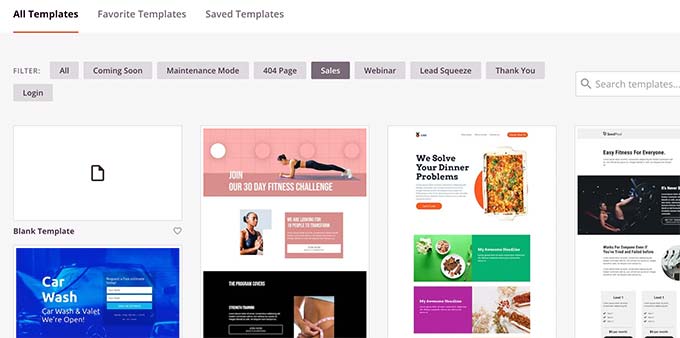
Simply click on a template to continue.
SeedProd will then ask you to provide a title for your page and choose a URL.
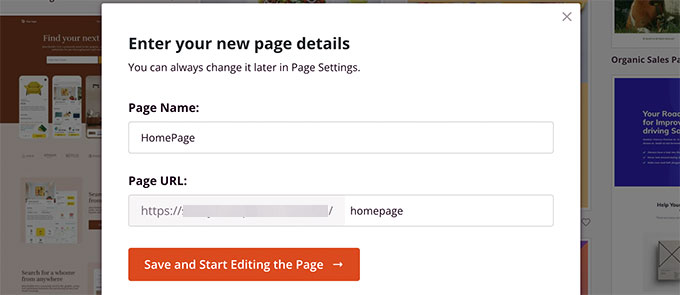
After entering the required information,. click on the Save and Start Editing the Page button.
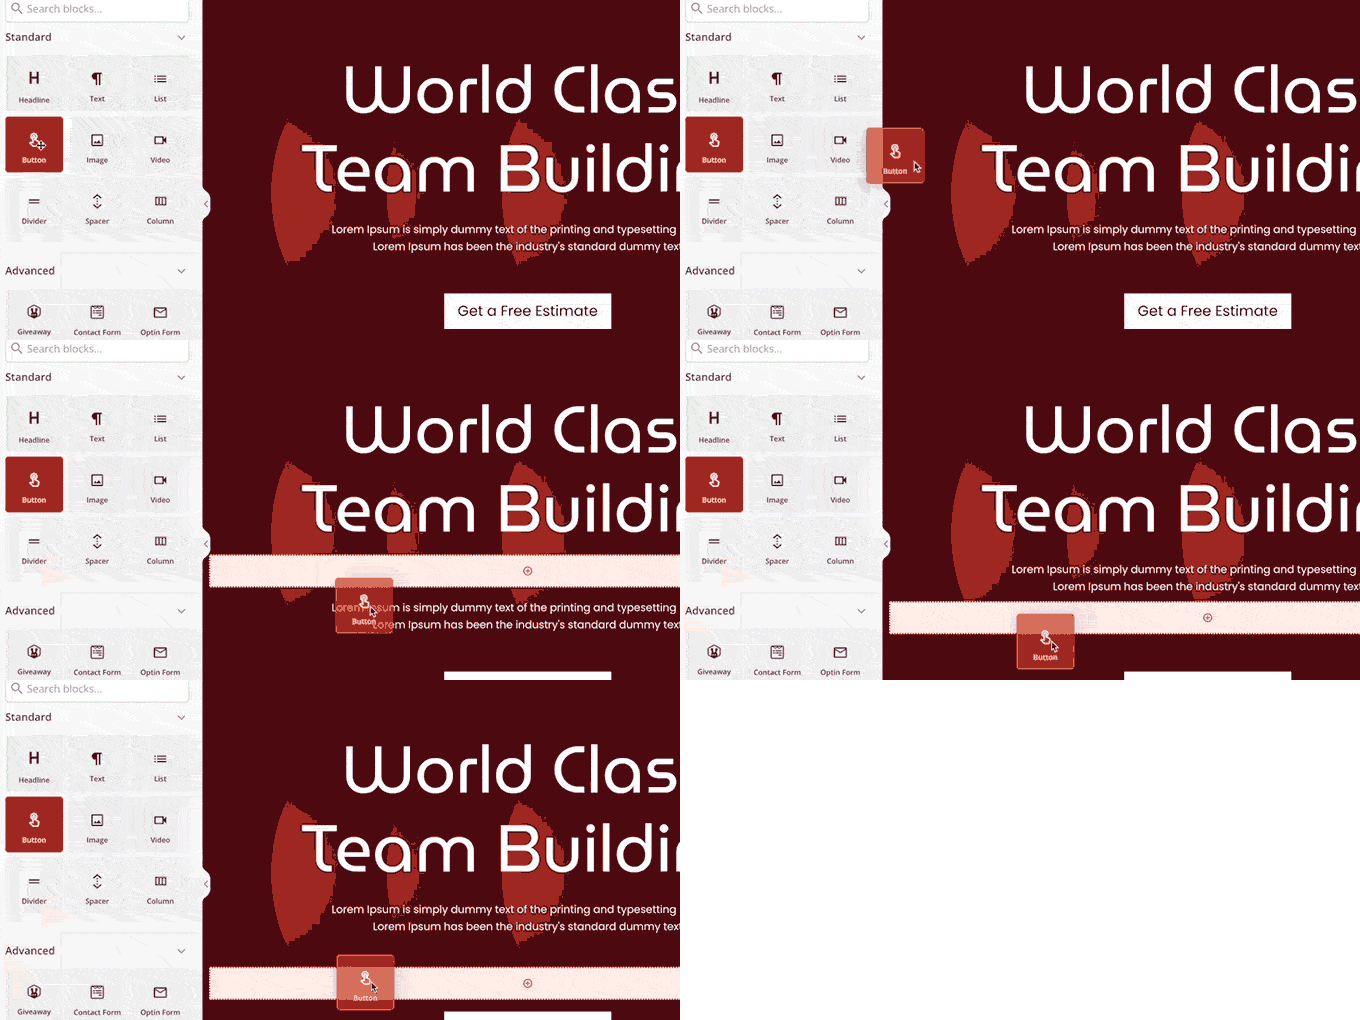
This will launch the SeedProd page builder interface. This is a drag and drop design tool.
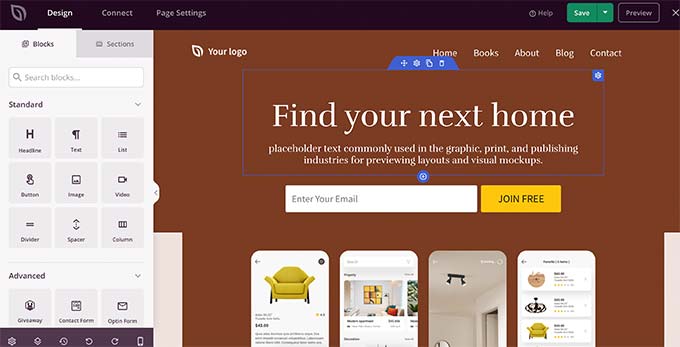
To your left, you’ll see blocks and sections that you can add to your page layout with a live editable preview of the page to the right.
You can simply point and click on any element of your page to edit it.
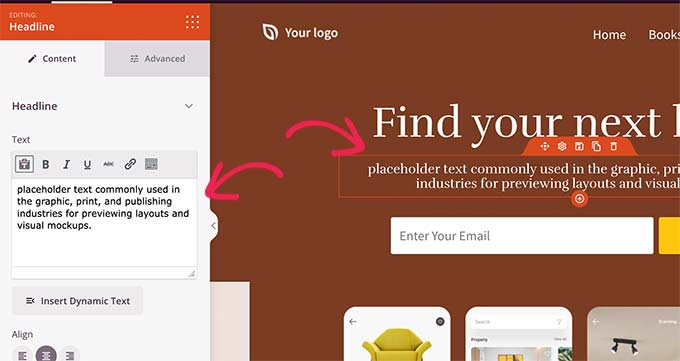
You can also add new blocks and even complete sections to your layout from the left column.
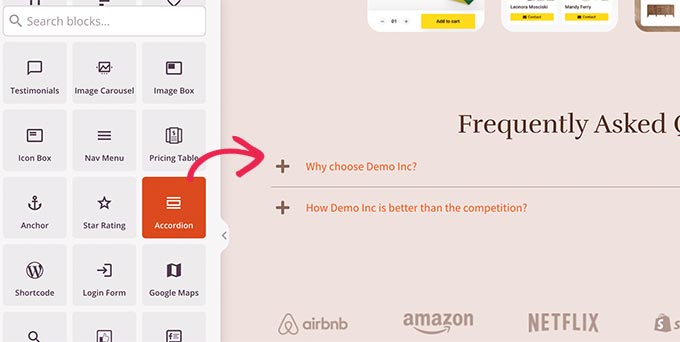
SeedProd comes with all the popular web design elements that you’ll need to make your website. It includes contact forms, optin forms, login forms, testimonials, progress bars, accordions, navigation menus, icon box, and a ton more.
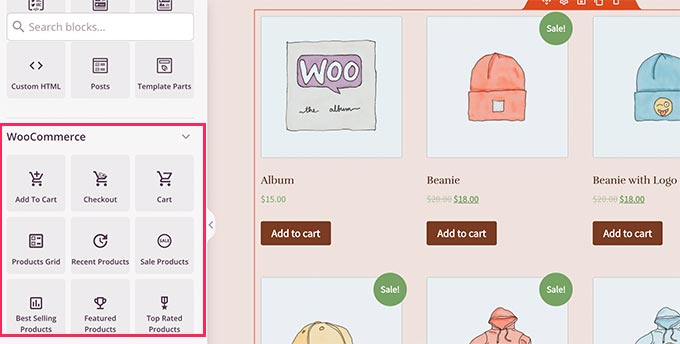
It also includes complete support for WooCommerce. You can use WooCommerce blocks to display products anywhere on your website, create a custom check out page, or design a cart page for your online store.
Once you are satisfied with your page design and layout, you can click on the Save button at the top right.
From here, you can also choose to publish the page or save it as a template.

That’s it! You can repeat this process to create more custom pages on your website.
Creating a Custom Theme in WordPress with SeedProd
This approach is highly recommended if you want to create a truly unique design for your blog, business website, or eCommerce store.
With this method, you’ll be designing your own custom WordPress theme from scratch using the same drag and drop page builder.
The best part is that your SeedProd custom theme will work no matter what theme you have installed on your site. That means you don’t need to worry about customizing a standard WordPress theme, but will have total freedom in creating your design.
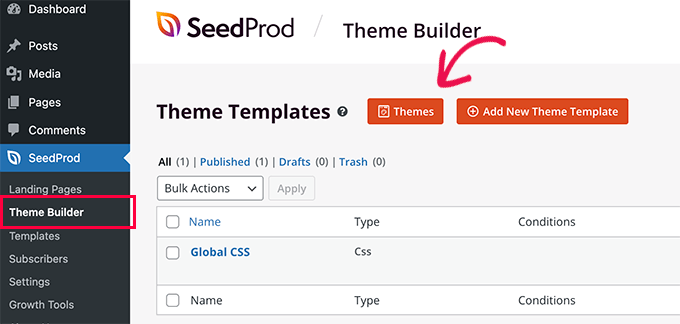
To get started, simply head over to SeedProd » Theme Bulder page and click on the Themes button.
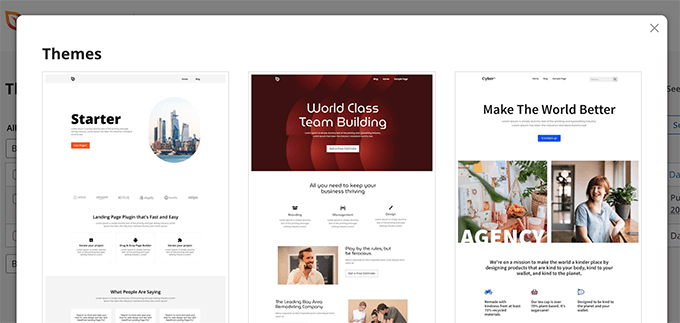
SeedProd will now now show you a bunch of starter themes to choose from.
You can completely modify every aspect of these themes.
Once you have chosen a theme, SeedProd will generate all the theme templates.
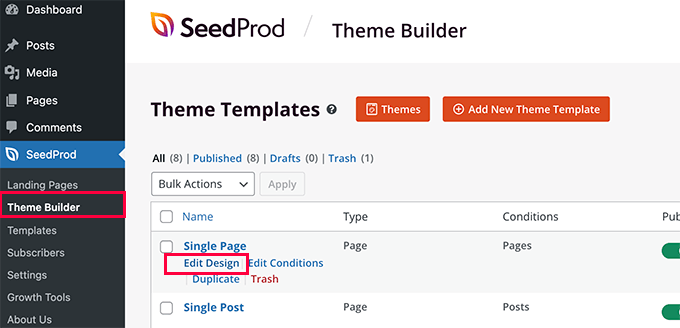
Simply click on the Edit Design link below a template file to edit it.
You’ll see a live preview of the template in the right column with an editing panel in the left column.
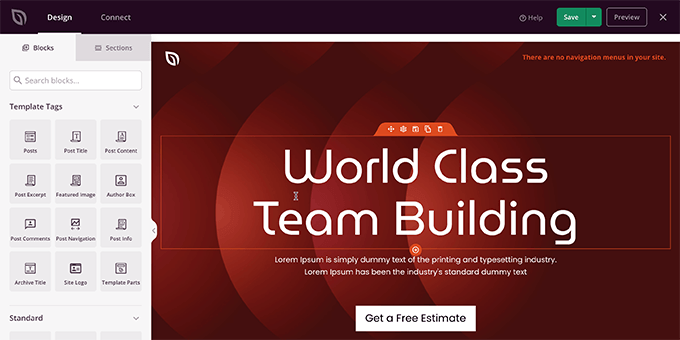
Simply point and click to edit any item or drop elements from the left column.
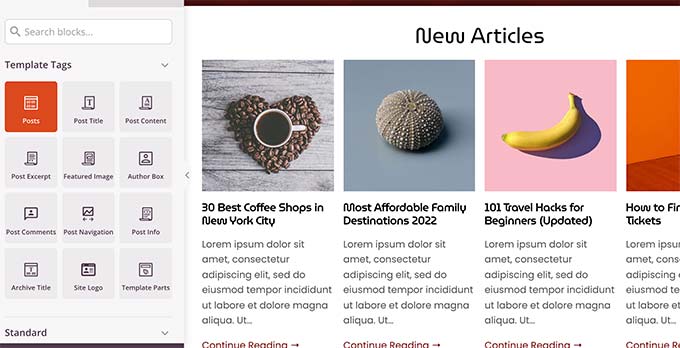
SeedProd also comes with blocks specific to site-wide editing.
These are dynamic blocks that you can use to display content loop (for blog posts), post title, featured image, and more.
Once you are done making changes to a theme, don’t forget to Save your changes.
Repeat the process to edit other templates to your own liking.
Once you are finished, go to the SeedProd » Theme Builder page and toggle the switch next to the ‘Enable SeedProd Theme’ option to ‘Yes’.

SeedProd will now replace your WordPress theme with the custom theme you just created.
To learn more about SeedProd WordPress theme builder, see our tutorial on how to create a custom WordPress theme without writing code.
We hope this article helped you learn how to customize your WordPress theme to your own liking.
You may also want to see our guide on how to create an email newsletter, or see our WordPress SEO guide to optimize your website for more search traffic.
If you liked this article, then please subscribe to our YouTube Channel for WordPress video tutorials. You can also find us on Twitter and Facebook.
The post How to Customize Your WordPress Theme (Beginner’s Guide) first appeared on WPBeginner.
Dr Crash says:


